6.4.1Docker Container Installation
This page provides additional details and guidance regarding installing Smile CDR in a Docker container. This section can be skipped if Smile CDR is being installed as a server application.
6.4.2Quick Start
Note: As of the 2023.02.R01 Release, Smile CDR no longer runs as the root user inside the Docker container.
Therefore, the following Docker container instructions have been revised to assume that the user deploying Smile CDR inside the Docker container is also not the root user.
If you are running on a Linux-based system and you are NOT the root user, then you will need to prefix the operating system commands shown below with sudo, but you will NOT need to use the sudo prefix if you are the root user on your system.
The following steps will result in a basic deployment of Smile CDR with out-of-the-box configuration in a Docker container.
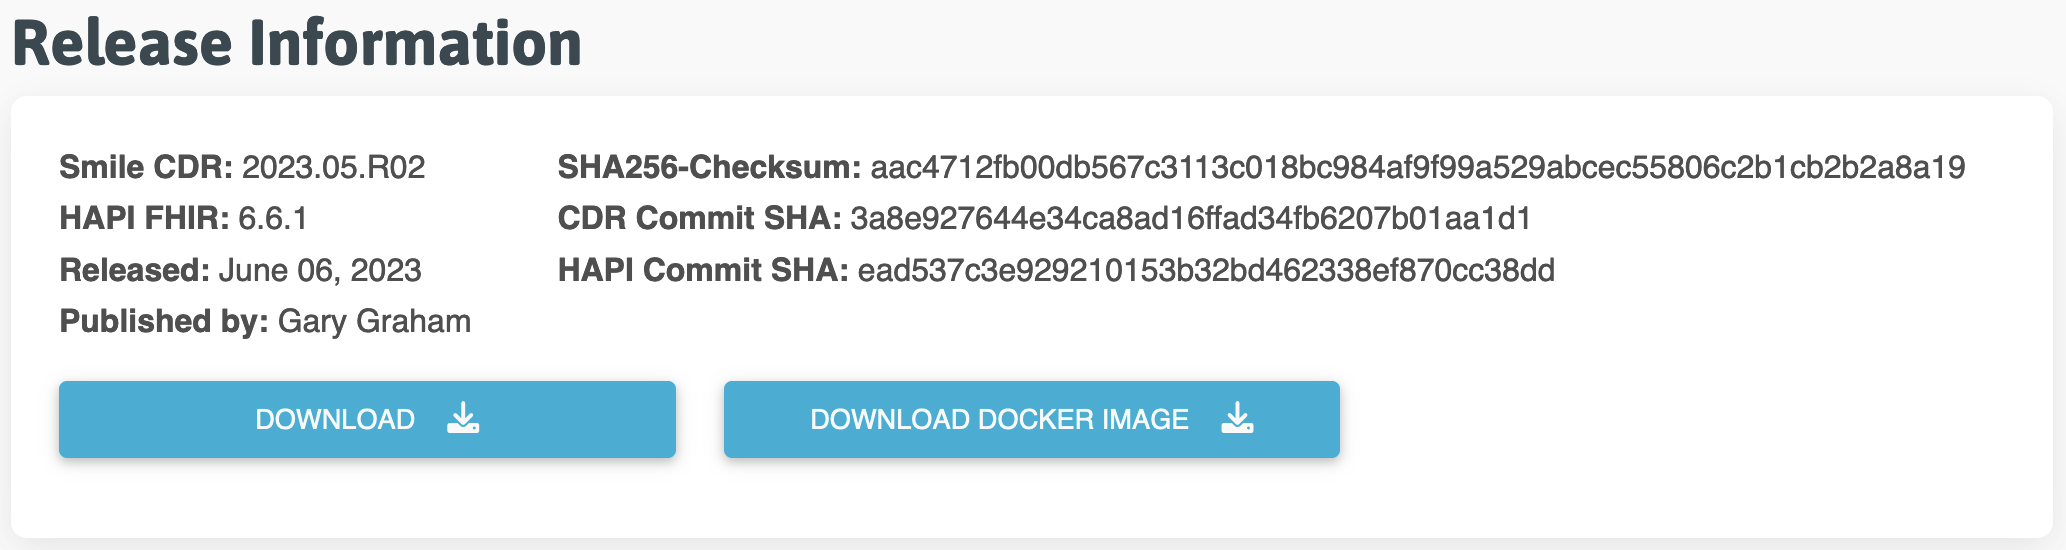
- Download the Smile CDR Docker Release that you wish to use from our Releases web site.
In the following scenario, we will be using the 2023.05.R02 version. Click on the DOWNLOAD DOCKER IMAGE button shown in the screenshot:
Note: You can contact your Customer Success representative to obtain your login information.
-
Create a working folder on your machine and save the downloaded Docker Image file called
smilecdr-2023.05.R02-docker.tar.gzinside that working folder. -
Create a file called
docker-compose.ymlin your working folder with the following contents:
version: "3.8"
services:
  smilecdr:
    container_name: smilecdr-2023.05.R02
    image: smilecdr:2023.05.R02
    platform: linux/amd64  # or linux/arm64
    build:
      context: .
      dockerfile: Dockerfile
    ports:
      - "8000:8000"
      - "8001:8001"
      - "9000:9000"
      - "9100:9100"
      - "9200:9200"
      - "9201:9201"
    volumes:
      - db:/home/smile/smilecdr/database
      - log:/home/smile/smilecdr/log
      - mq:/home/smile/smilecdr/activemq-data
      - tmp:/home/smile/smilecdr/tmp
    restart: "unless-stopped"
volumes:
  db:
  log:
  mq:
  tmp:
Note: It is important to specify the correct platform field in this file. This ensures that Docker uses the downloaded image and does not attempt to pull the image from a remote repository. Smile supports images for the linux/amd64 and linux/arm64 platforms.
- Create another file in your working folder called
Dockerfilewith the following contents:
FROM smilecdr:2023.05.R02

RUN mkdir /home/smile/smilecdr/activemq-data
RUN mkdir /home/smile/smilecdr/database
RUN mkdir /home/smile/smilecdr/log
RUN mkdir /home/smile/smilecdr/tmp
RUN chown -R smile:smile /home/smile/smilecdr/activemq-data
RUN chown -R smile:smile /home/smile/smilecdr/database
RUN chown -R smile:smile /home/smile/smilecdr/log
RUN chown -R smile:smile /home/smile/smilecdr/tmp
RUN chmod 775 /home/smile/smilecdr/activemq-data
RUN chmod 775 /home/smile/smilecdr/database
RUN chmod 775 /home/smile/smilecdr/log
RUN chmod 775 /home/smile/smilecdr/tmp
- Load the Smile CDR image into Docker
docker image load --input smilecdr-2023.05.R02-docker.tar.gz
- Tag the image with the appropriate release version.
docker tag smilecdr:latest smilecdr:2023.05.R02
- Start the Docker container
docker compose -f docker-compose.yml up -d --build
- Monitor the logs during the startup process
docker container logs -f smilecdr-2023.05.R02
6.4.2.1Verifying Deployment
Assuming you see the phrase Smile, we're up and running! :) in the logs, you have now started the software. To exit the logs without stopping the container, simply type (ctrl-c).
With the software started, you can try a few things (replace localhost in the URLs below with the host name of your server if you are installing to a remote server):
- Log into the Web Admin Console at http://localhost:9100.
- This is the administration UI for configuring the system.
- Username:
admin(by default a single user with full privileges is created) - Password:
password
- Log into the FHIRWeb Console at http://localhost:8001.
- This is a FHIR testing tool which lets you explore the FHIR API.
- Make FHIR requests against the endpoint at http://localhost:8000
- This is an actual FHIR endpoint, so it is best to use a REST utility such as Postman to work with this endpoint. Note that by default the endpoint is secured with HTTP Basic auth, and will not accept anonymous requests.
- Explore the JSON Admin API at http://localhost:9000.
- This API may be used to configure the system via REST calls.
6.4.2.2Troubleshooting Problems
If Smile CDR fails to start or does not appear to be responsive, here are a couple things that you can check:
- Check whether the container is running by executing the command
docker ps. If the container is running, you should see output similar to the following:
CONTAINER ID        IMAGE               COMMAND                  CREATED             STATUS              PORTS                                                                                                                NAMES
7e401352ab80        smilecdr            "/home/smile/smilecd…"   22 minutes ago      Up 17 minutes       0.0.0.0:8000-8001->8000-8001/tcp, 0.0.0.0:9000->9000/tcp, 0.0.0.0:9100->9100/tcp, 0.0.0.0:9200-9201->9200-9201/tcp   smilecdr
- You can start a shell session inside the running container using the following command:
docker exec -it smilecdr-2023.05.R02 /bin/bash
- Retrieve and/or examine the Smile CDR logs. There are a couple of options available for this:
- Use the command
docker container logs smilecdr-2023.05.R02to see recent console output. - Copy the log files from the container to a local folder as follows:
- Use the command
docker cp smilecdr-2023.05.R02:/home/smile/smilecdr/log/smile.log ./smile.log
6.4.2.3Clean Up
When you are finished with this initial test, you can use the following command to stop and clean up the running container:
docker-compose -f docker-compose.yml down -v
6.4.3Basic Configuration
To retrieve and review copies of the bin/ and classes/ folders deployed to the container when it is not running, you can use the docker cp command as follows:
docker cp smilecdr:/home/smile/smilecdr/bin /local/folder/bindocker cp smilecdr:/home/smile/smilecdr/classes /local/folder/classes
Before starting Smile CDR for the first time, there are two files you will want to examine for settings.
6.4.3.11. Environment Settings
In the bin/ directory you will find a file called setenv. This file may be used to change the amount of RAM available to Smile CDR, as well as number of other low level settings. It is a good idea to glance over it and ensure that the default settings make sense for your installation.
6.4.3.22. Application Configuration
In the classes/ directory you will find a file called cdr-config-Master.properties. This file contains all of the configuration for the modules which will be created the first time the system is started.
If changes are required to either of the configuration files above, these can be made by editing local copies of the configuration files and then copying the modified local files back to the container using the docker cp command:
docker cp ./bin/setenv smilecdr-2023.05.R02:/home/smile/smilecdr/bin
6.4.4Customizing Smile CDR in Docker Container
If there is a need to change the configuration files or environment settings or to add jars to the customerlib/ directory in the Smile CDR container you can do this by creating a customized Smile CDR image based on the provided Smile CDR image and then re-creating the container using the command shown previously.
To create a customized Smile CDR image:
-
Setup Docker context
When building Docker images, you need to specify a single folder or context where Docker can find all of the build dependencies. Ensure that all of your configuration changes and additions are contained within a single folder, or create a new subfolder and copy all of your changes there.
-
Create a Dockerfile
Create a new Dockerfile that uses the original Smile CDR image as the base image and includes instructions for any additions or updates needed for the new image. For example:
# Use base Smile CDR image as parent image FROM smilecdr # Set the smilecdr folder as working directory WORKDIR /home/smile/smilecdr # Copy modified properties file to the container. copy ./my-config-Master.properties ./classes/cdr-config-Master.properties # Copy modified environment settings file to the container. copy ./setenv_modified ./bin/setenv # Add jar files to customerlib folder. copy ./sitelib.jar ./customerlib/sitelib.jar -
Build a new Docker image
Execute the
docker image buildcommand to build a new image, for example:docker image build -f Dockerfile .The
-foption above is used to specify the path and name of the Dockerfile. The last parameter (.) is the location of the Docker context folder which contains all of the changes and additions that are to be copied/added to the image. In the above example, it is specifying the current directory but it can point to any valid path on your local machine.
6.4.5Using System Environment for Variable Substitution
Environment variables can be set inside the Smile CDR Docker container using the environment or env_file options in the docker-compose.yml file.
6.4.5.1Configuration Properties
For example, if different environments use a different database password, you can alter the default Smile CDR configuration file inside the Docker container which includes a cdr-config-Master.properties file with the following parameters:
module.clustermgr.config.db.password = #{env['DB_PASSWORD_CLUSTERMGR']}
Then you can set a different password for each environment using a docker-compose.yml file for each environment, similar to the following:
version: "3.8"
services:
  smilecdr:
    container_name: smilecdr-2023.05.R02
    image: smilecdr:2023.05.R02
    build:
      context: .
      dockerfile: Dockerfile
    ports:
      - "8000:8000"
      - "9000:9000"
      - "9100:9100"
      - "8001:8001"
      - "9200:9200"
      - "9201:9201"
    environment:
      - DB_PASSWORD_CLUSTERMGR=password
    volumes:
      - db:/home/smile/smilecdr/database
      - log:/home/smile/smilecdr/log
      - mq:/home/smile/smilecdr/activemq-data
      - tmp:/home/smile/smilecdr/tmp
    restart: "unless-stopped"
volumes:
  db:
  log:
  mq:
  tmp:
6.4.5.2Runtime Environment Settings
Alternatively, Docker container environment variables can be used to override default JVM and other environment settings normally determined by the setenv script. For example, the following command could be used to build and launch a Smile CDR Docker container with the JVMARGS setting determined by an external file (jvmargs.env in the example below):
version: "3.8"
services:
  smilecdr:
    container_name: smilecdr-2023.05.R02
    image: smilecdr:2023.05.R02
    build:
      context: .
      dockerfile: Dockerfile
    ports:
      - "8000:8000"
      - "9000:9000"
      - "9100:9100"
      - "8001:8001"
      - "9200:9200"
      - "9201:9201"
    env_file:
      - ./jvmargs.env
    volumes:
      - db:/home/smile/smilecdr/database
      - log:/home/smile/smilecdr/log
      - mq:/home/smile/smilecdr/activemq-data
      - tmp:/home/smile/smilecdr/tmp
    restart: "unless-stopped"
volumes:
  db:
  log:
  mq:
  tmp:
6.4.6Configuring Databases for Smile CDR Installed in Container
When configuring a database that requires a URL with a hostname such as PostgreSQL or MySQL, the hostname "localhost" will not be recognized by Smile CDR implementations running in a Docker container. Instead, you will need to specify one of the following:
- If deploying on a Windows or OSX server, use
host.docker.internalin place of "localhost". - If deploying on a Linux server, use the actual IP address of the server hosting the database. Note that for this to work, you will need to first ensure that the database is configured to listen for connections on the server's IP address. For example, in PostgreSQL it may be necessary to add an entry for the IP address in the pg_hba.conf configuration file.
An alternative approach is to install both Smile CDR and the database in a Docker stack. See this page for an example of how this could be done.