27.2.1Associated Module ConfigurationsTrial
The appSphere module interacts with other modules in Smile CDR. It is important that the configurations of the associated modules be set accordingly so that the appSphere module will function correctly.
27.2.2Configuration of JSON Admin API moduleTrial
The admin_json module is in a standard Smile installation. If it is not installed, learn more about installing it here.
The admin_json module has several configurable sections.
Ensure the following are assigned for the respective configurable sections:
HTTP Listener
- Listener Port (e.g., 19000)
- Context Path (e.g., /json-admin)
- Endpoint Health Path (e.g., /endpoint-health)
- Respect Forward Headers toggled to “Yes”
Cross-Origin Resource Sharing (CORS)
- CORS Enabled toggled to “Yes”
- CORS Origins: [comma-separated list of allowable URLs is recommended, however the wildcard value “*” can be used for testing]
Auth: General for APIs
- Allow Anonymous Access toggled to “No”
Auth: OpenID Connect
- OpenID Connect Security toggled to “Yes”
Dependencies
- Username/Password Authentication: from the dropdown, select
local_security (Local Inbound Security) - OpenID Connect Authentication: from the dropdown, select
smart_auth (SMART Outbound Security)
After the configurations have been made, select “Save” at the top of the page to get redirected to the “Configuration” page. A confirmation message would be displayed for the newly added module. It is recommended to “Restart” the module if any changes are made.
On the same page, the newly added admin_json module will be displayed under the “Manage Node Modules” table and in the Administrative Modules section in the menu pane on the left with a green checkmark icon to indicate a correctly functioning module.
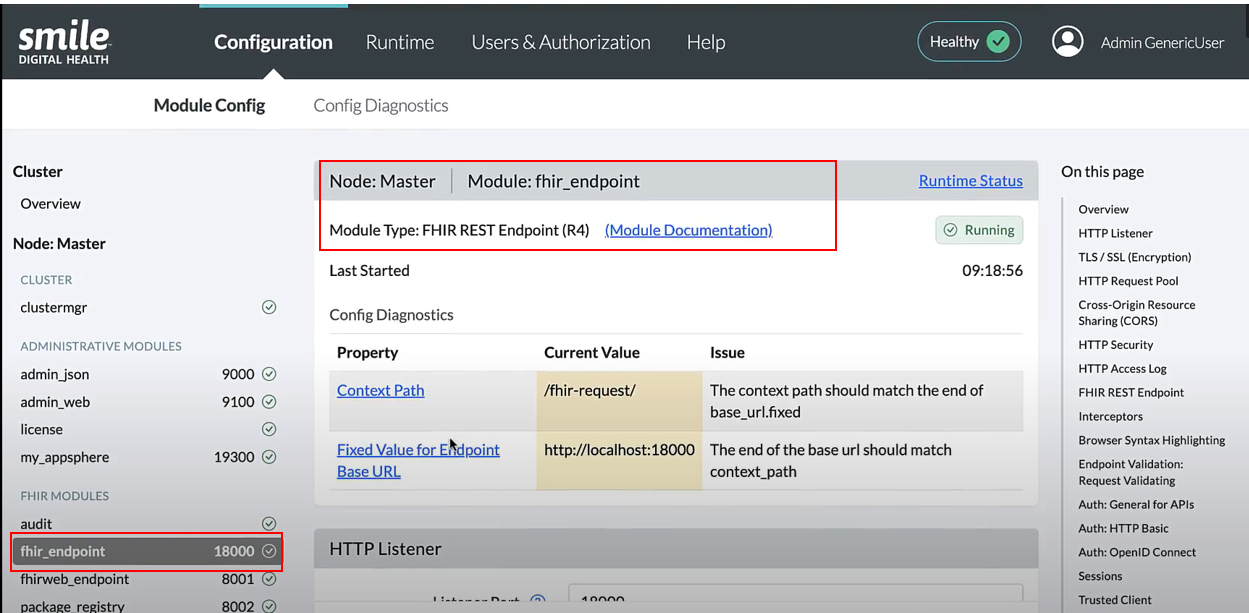
27.2.3Configuration of FHIR Endpoint ModuleTrial
The fhir_endpoint module is included in a standard Smile installation. If it does not come pre-installed, learn more about installing it here.
The fhir_endpoint module has the following configurable sections:
- HTTP Listener
- TLS / SSL (Encryption)
- HTTP Request Pool
- Cross-Origin Resource Sharing (CORS)
- HTTP Security
- HTTP Access Log
- FHIR REST Endpoint
- Interceptors
- Browser Syntax Highlighting
- Endpoint Validation: Request Validating
- Auth: General for APIs
- Auth: HTTP Basic
- Auth: OpenID Connect
- Trusted Client
- FHIR Endpoint Partitioning
- FHIR Endpoint Security
- FHIR Endpoint Conversion
- Endpoint Terminology
- Consent Service
- Capability Statement
- Dependencies
- Custom Resource Providers
Ensure the following are assigned for the respective configurable sections:
HTTP Listener section
- Listener Port (e.g., 18000)
- Context Path (e.g., /fhir-request)
- Endpoint Health Path (e.g., /endpoint-health)
- Respect Forward Headers toggled to “Yes”
Cross-Origin Resource Sharing (CORS)
- CORS Enabled toggled to “Yes”
- CORS Origins: [comma-separated list of allowable URLs is recommended, however the wildcard value “*” can be used for testing]
FHIR REST Endpoint
- Pretty-Print by Default toggled to “Yes”
- Default Encoding: from the dropdown select “JSON”
- Default Prefer Return: from the dropdown, select “REPRESENTATION”
Browser Syntax Highlighting
- Browser Syntax Highlighting Enabled toggled to “Yes”
- Show Response Headers toggled to “Yes”
Auth: General for APIs
- Allow Anonymous Access toggled to “No”
Auth: HTTP Basic
- HTTP Basic Security toggled to “Yes”
- HTTP Basic Realm: Smile CDR (by default but configurable; learn more here)
Auth: OpenID Connect
- OpenID Connect Security toggled to “Yes”
FHIR Endpoint Partitioning
- Tenant Identification Strategy: from the dropdown select “None”
Capability Statement
- Implementation Description: “FHIR Endpoint powered by Smile CDR”
- Enable OpenAPI/Swagger Support toggled to “Yes”
- To get a list of partitions, ensure the “Include Partition Name” is toggled to “Yes” under the advanced properties. Learn more here)
Dependencies
- Username/Password Authentication: from the dropdown select
local_security (Local Inbound Security) - FHIR R4 Storage: from the dropdown, select
persistence (FHIR Storage (R4 Relational))or as appropriate - OpenID Connect Authentication: from the dropdown, select
smart_auth (SMART Outbound Security)
After the configurations have been made, select “Save” at the top of the page to get redirected to the “Configuration” page where a confirmation message would be displayed for the configurations made. It is also recommended to “Restart” the module if any changes are made.
On the same page, the module will be displayed under the “Manage Node Modules” table and in the FHIR Modules section in the menu pane on the left with a green checkmark icon to indicate a correctly functioning module.
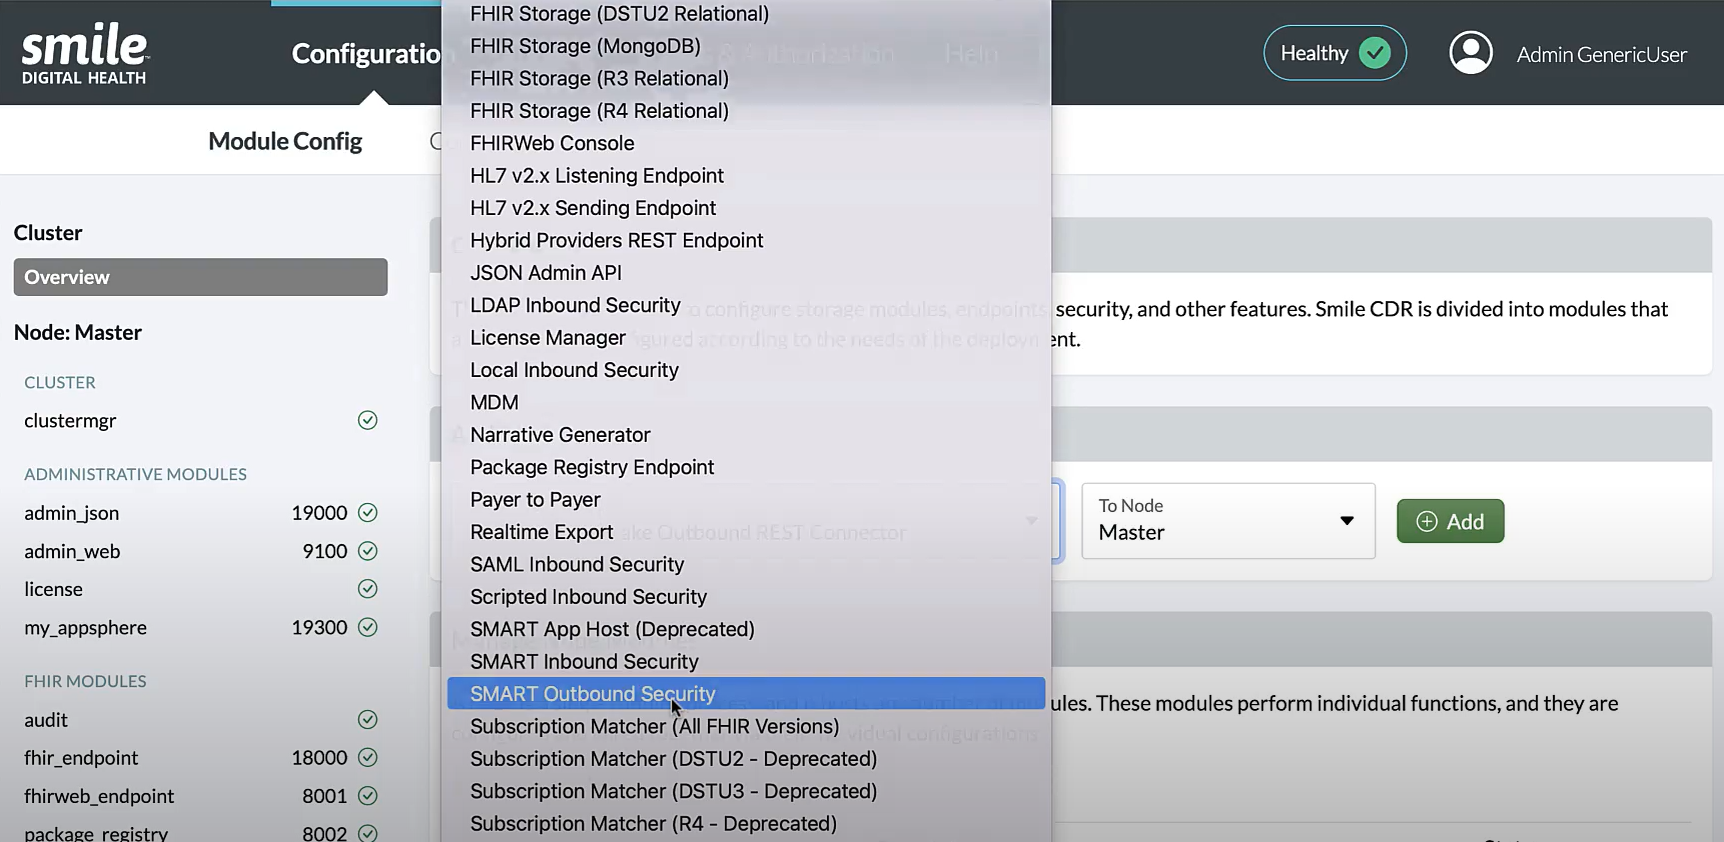
27.2.4Configuration of SMART Auth ModuleTrial
The smart_auth module is included in a standard Smile installation. The module configuration is documented here.
Ensure the following are assigned for the respective configurable sections:
HTTP Listener
- Listener Port (e.g., 19200)
- Context Path (e.g., /smartauth/)
- Endpoint Health Path (e.g., /endpoint-health)
- Respect Forward Headers toggled to “Yes”
Cross-Origin Resource Sharing (CORS)
- CORS Enabled toggled to “Yes”
- CORS Origins: [comma-separated list of allowable origins is recommended, however the wildcard value “*” can be used to allow CORS for all domains, however this is generally not considered a good practice for production systems serving sensitive data]
JSON Web KeySet (JWKS)
- Signing JWKS (File): provide it in either file or text format in order to load a JWKS (JSON Web KeySet) file that is used for signing OpenID Connect tokens. In the case of files placed in the Smile CDR classes directory, the format should be classpath:/filename.jwks, for e.g., classpath:/smilecdr-demo.jwks)
OIDC
- Client Secret Encoding: from the dropdown, select “BCRYPT_12_Round”
- Smile CDR generated Client Secret expiry duration in days: enter the expiry duration in days for Smile CDR generated client secrets (e.g., 365 days)
- SMART Capabilities
List: see here for more information
- launch-ehr
- client-public
- client-confidential-symmetric
- context-ehr-patient
- context-standalone-patient
- sso-openid-connect
- permission-patient
- launch-standalone
- permission-offline
- PKCE Plain Challenge Supported toggled to “Yes”
- Issuer URL: enter the URL to be placed in OpenID Connect tokens as the
iss(issuer) token. The value should be the URL to the identity server (e.g., https://try.smilecdr.com/smartauth/) - Cache Authorizations in millis (e.g., 3000)
Sessions
- Session Timeout: for the number of minutes that a user session can sit idle before it is eligible to expire (e.g., 30 min)
- Session Scavenger Interval: for the number of milliseconds between session scavenger passes (e.g., 60,000 ms)
SMART Authorization
- Enforce Approve Scopes to Restrict Permissions toggled to “Yes”
- Scopes Supported: “openid fhirUser”
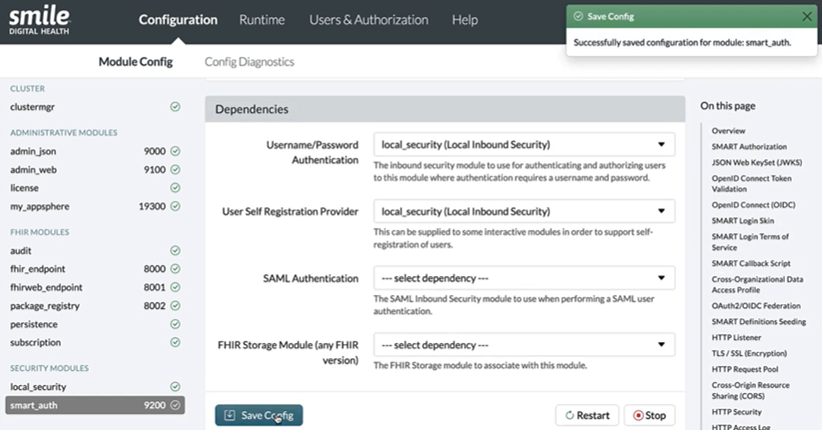
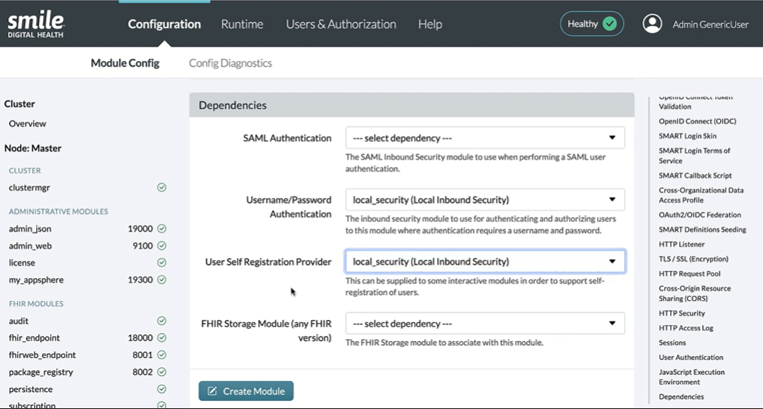
Dependencies
- Username/Password Authentication: from the dropdown, select
local_security (Local Inbound Security) - User Self Registration Provider: from the dropdown, select
local_security (Local Inbound Security)to enable self-registration of users, see here
The following is a sample script that enables self-registered users to access all the developer portal capabilities:
function onUserSelfRegistrationRequest(theInputUser, theOutputUser) {
    theOutputUser.familyName = theInputUser.familyName;
    theOutputUser.givenName = theInputUser.givenName;
    theOutputUser.email = theInputUser.email;
    theOutputUser.addAuthority('ACCESS_ADMIN_JSON');
    theOutputUser.addAuthority('AG_DEV_PORTAL_READ');
    theOutputUser.addAuthority('AG_DEV_PORTAL_WRITE');
    theOutputUser.addAuthority('OPENID_CONNECT_ADD_CLIENT');
    theOutputUser.addAuthority('OPENID_CONNECT_EDIT_CLIENT');
}
After the configurations have been made, select “Save” at the top of the page to get redirected to the “Configuration” page. A confirmation message would be displayed for the newly added module. It is recommended to “Restart” the module if any changes are made.
** IMPORTANT NOTE **
If the context path is changed in smart_auth, admin_json, or fhir_endpoint modules, the corresponding URLs in appSphere module configuration must be changed accordingly.
27.2.5Configuring SMART Auth modules to support multiple OIDC endpointsTrial
Sometimes it might be preferable to use an OIDC module to authenticate patients/members and a separate module to authenticate 3rd-party developers and CDR admins. This may be the case when an identity store for developers and CDR admins exists, but one doesn’t for patients/members, or vice versa. Therefore, to ensure distinction in the authentication of users for the appSphere, the creation of a new smart_auth (SMART Outbound Security) module is necessary to ensure correct direction of logins for patients/members, 3rd-party developers, and CDR admins. This is done by ensuring that those that need to access clinical FHIR data, such as patients and their apps, are directed to the appropriate FHIR endpoint, which can be set in the ‘Dependencies’ section of the appSphere module.
The following steps will describe how to set up a new smart_auth module for patients/members, for the sake of simplicity. However, keep in mind the intent is to describe how multiple smart_auth modules are configured to work correctly with the appSphere module, rather than an explicit recommendation to add a smart_auth module for patients/members. At the end, two smart_auth modules should exist: one for patients/members, and one for developers/CDR admins. The FHIR endpoint will use the former, and the appSphere module will use the latter.
Assuming that the smart_auth module for developers and CDR admins is already configured, called the smart_auth (SMART Outbound Security) module (which may or may not be in federated mode), a second smart_auth (
SMART Outbound Security) module will need to be created, which we will call smart_auth_fhir to enable patients/members to access the FHIR endpoints when using variable entry points. Full configuration for the smart_auth module is described here.
In order to create the new smart_auth (SMART Outbound Security) module called smart_auth_fhir, the following changes need to be made to ensure the smart_auth_fhir module is distinguishable from the already configured smart_auth (SMART Outbound Security) module:
- Module ID: smart_auth_fhir
- Listener Port: an open port (e.g., 19302)
- Context Path:/smartauth-fhir
- Issuer URL: https://[your-domain]/smartauth-fhir
After the required configurations have been made, select “Save” at the top of the page to get redirected to the “Configuration” page. A confirmation message would be displayed for the newly added module. It is recommended to “Restart” the module.
Once the new smart_auth (SMART Outbound Security) module is created, called smart_auth_fhir, ensure that ‘OpenID Connect Authentication’ under ‘Dependencies’ in the fhir_endpoint module is configured to use smart_auth_fhir, if it is not already. If changes are made, select ‘”Save” and it is recommended to “Restart” the module.
In the appSphere module, ensure that under the ‘Dependencies’ section, fhir_endpoint is selected for the ‘FHIR Endpoint’ field (the default value can be null for the simple case of a single appSphere module using a single SMART module) and that smart_auth (SMART Outbound Security) is selected under ‘OpenID Connect Authentication’. After the mentioned configurations are made, select ”Save” and it is recommended to “Restart” the module if any changes are made.
** IMPORTANT NOTE **
Existing ‘Live’ apps will need to be re-registered to ensure the aforementioned configuration functions correctly.
27.2.6Setting-up Federated OAuth to work with appSphereTrial
In addition to the aforementioned configurations for the smart_auth module, ensure the following is assigned to set-up federated OAuth:
Additional Configuration
- Federated OAuth2/OIDC Login toggled to “Yes” to enable the use of an external identity provider
Next, follow the steps mentioned here for creating an OIDC server and setting up the IDP. To create the OIDC client, see section 14.3.
The following script could also be inserted in the Authorization Script to enable access and assign permissions for developer and admin roles when using a federated provider.
 // roles is an array of user's roles passed back from the federated provider via a claim in the ID Token.
       // the ID might be fetched using an HTTP call, or derived from something else.
        const roles = theContext.getStringArrayClaim('roles');

        if (roles && roles.includes('agdeveloper')){
            // Add necessary Smile CDR permissions for accessing Developer Portal
            theOutcome.addAuthority('ACCESS_ADMIN_JSON');
            theOutcome.addAuthority('AG_DEV_PORTAL_READ');
            theOutcome.addAuthority('AG_DEV_PORTAL_WRITE');
            theOutcome.addAuthority('OPENID_CONNECT_ADD_CLIENT');
            theOutcome.addAuthority('OPENID_CONNECT_EDIT_CLIENT');
        }

        if (roles && roles.includes('agadmin')){
            // Add necessary Smile CDR permissions for accessing Admin Console
            theOutcome.addAuthority('ACCESS_ADMIN_JSON');
            theOutcome.addAuthority('AG_ADMIN_CONSOLE_READ');
            theOutcome.addAuthority('AG_ADMIN_CONSOLE_WRITE');
            theOutcome.addAuthority('OPENID_CONNECT_ADD_CLIENT');
            theOutcome.addAuthority('OPENID_CONNECT_EDIT_CLIENT');
            theOutcome.addAuthority('OPENID_CONNECT_VIEW_CLIENT_LIST');
        }