27.5.1Developer PortalTrial
A public-facing website where vendors can register one or multiple applications and provide information about the apps for system administrators and patients who use the apps. Vendors can also track the status of their application registrations.
27.5.2API Documentation for Dev PortalTrial
These are resources that we recommend for internal or third-party SMART on FHIR developers to help get SMART on FHIR App running and connected to Smile CDR. Developers should also review the RESTful API documentation for FHIR here.
While Smile maintains this documentation, we recommend that the Developer Portal feature users include these resources in a publicly accessible web page for app developers to access conveniently.
27.5.2.1SMART on FHIR
- Introduction
- Auth Flows
- Access Tokens
- Scopes
- Endpoints
- SMART App Launch Framework
- Other SMART Developer Resources
27.5.2.2Transacting with the FHIR Server
27.5.3Developer RegistrationTrial
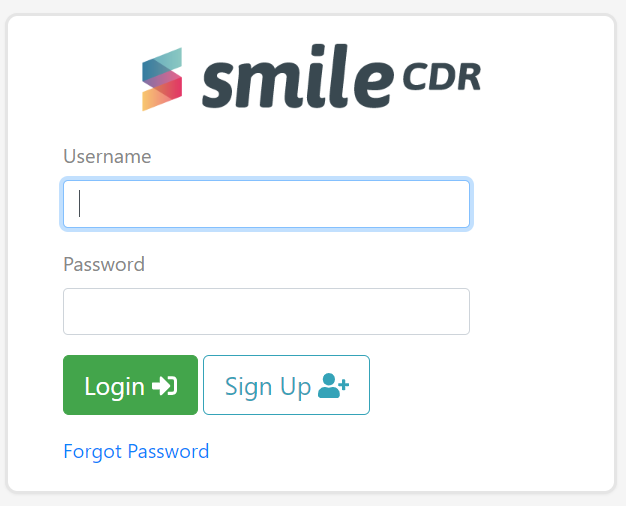
An account is required to gain access to the developer portal and begin registering 3rd party Apps. If self-registration has been set up for appSphere use (see here), creating a developer account requires the developer's first name, last name, email address, and creation of a password.

The developer registration process continues after the developer has logged in for the first time. The developer will be prompted to enter more identity information to set up their account:
27.5.3.1A. Individual
- Legal Full Name
- Address
- Phone Numbers
- Website
27.5.3.2B. Business
- Legal Full Name
- Legal Business Name
- Position/Designation
- D.U.N.S number (If applicable)
- Address
- Phone Numbers
- Website
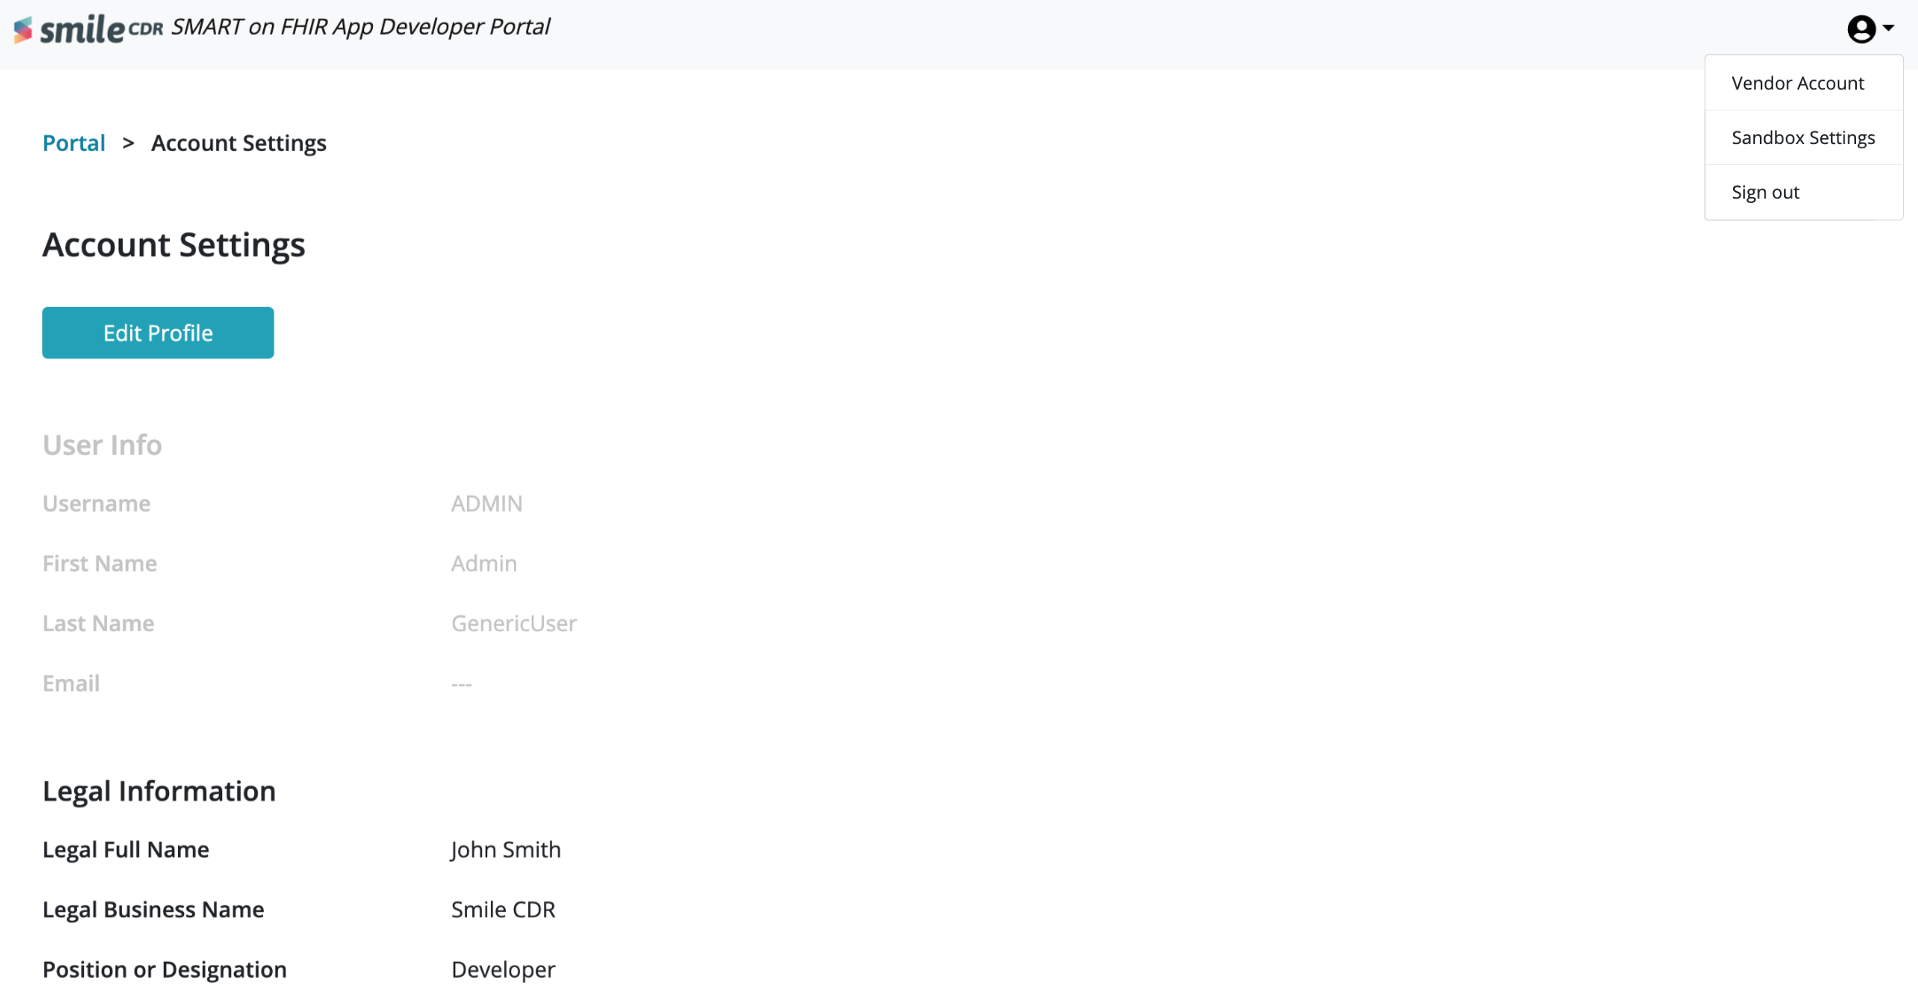
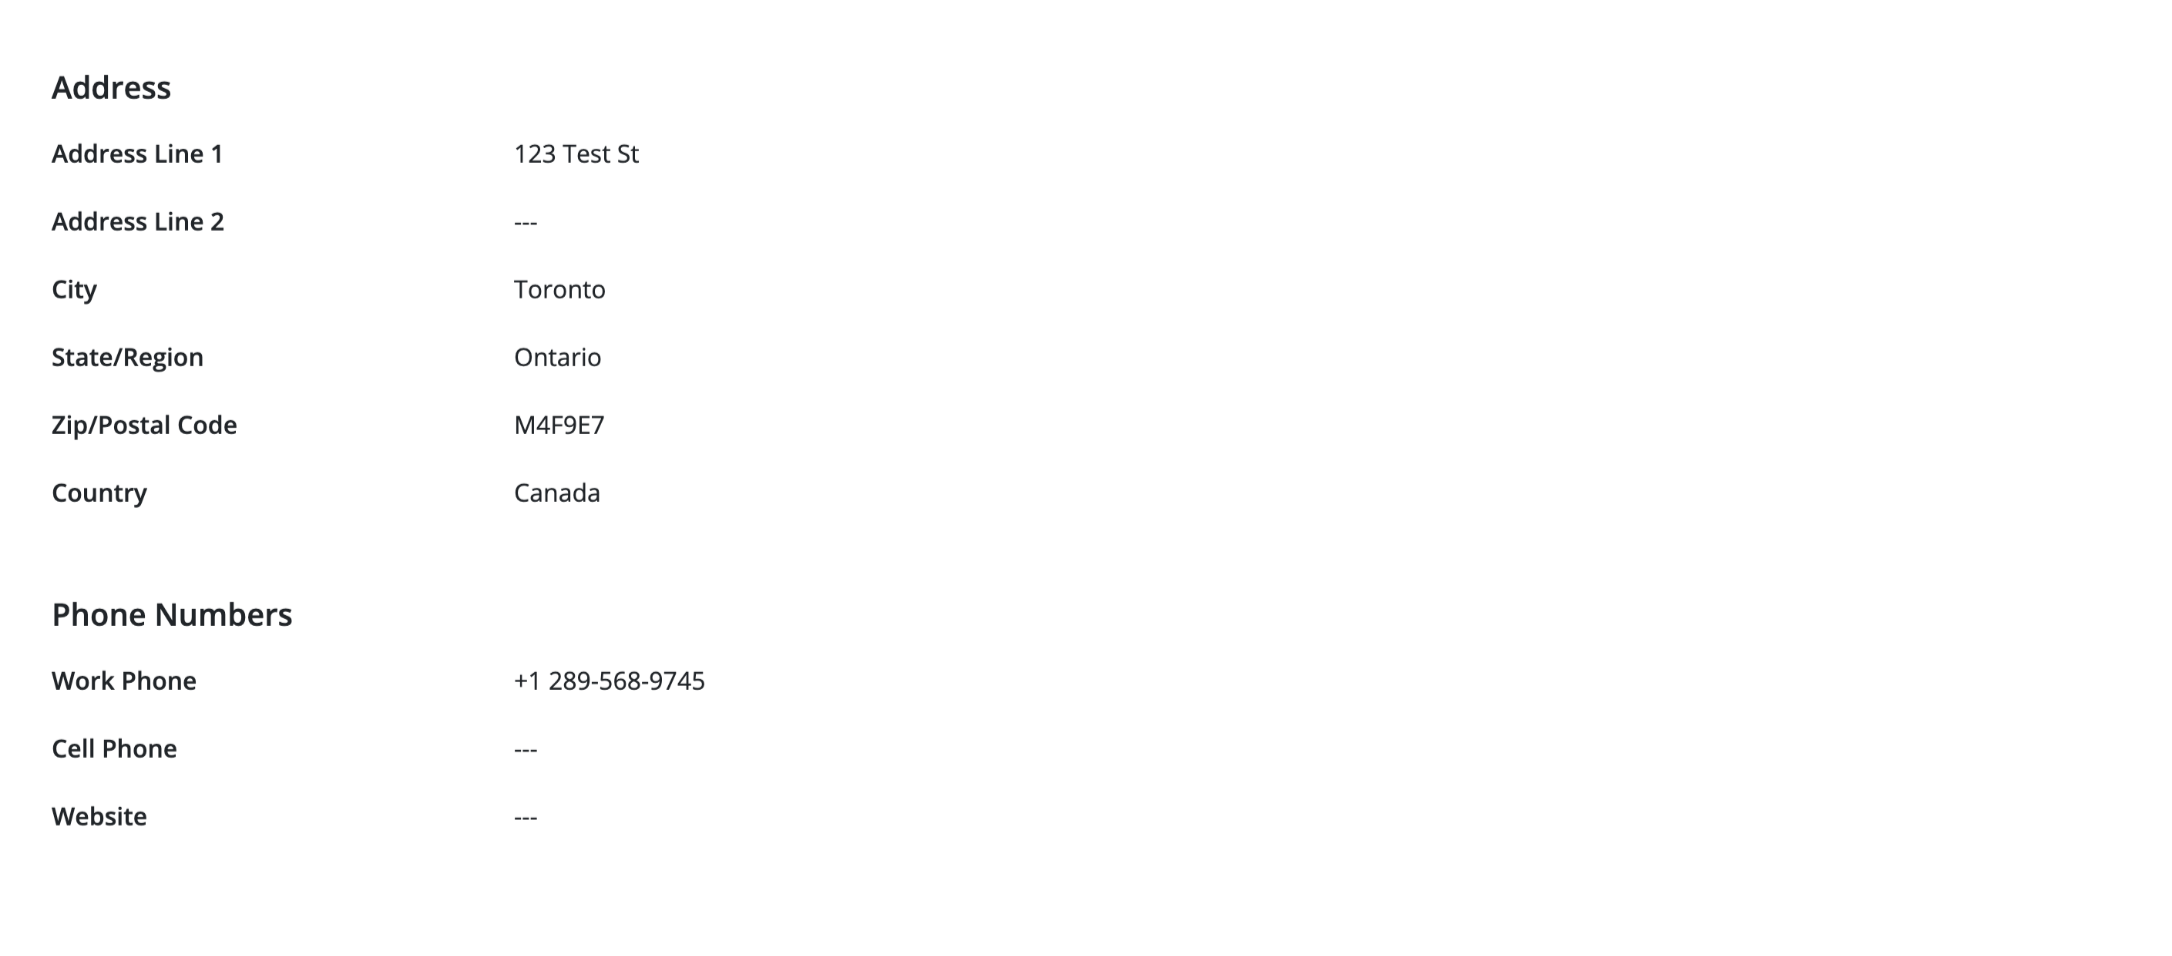
This information can be found in the "Vendor Account" tab under the profile dropdown list in the developer portal. Only the following information is editable as applicable:
- Legal Full Name
- Legal Business Name
- Position/Designation
- D.U.N.S number (if applicable)
- Address
- Phone Numbers
- Website
27.5.4Developer Portal: UI DescriptionTrial
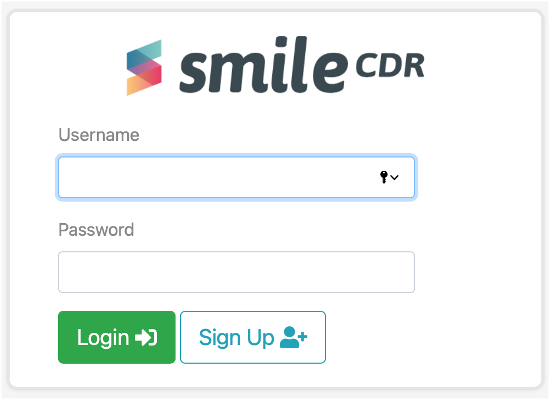
When the user clicks on the link to the appSphere developer portal, a 'Getting Started' page is first displayed. They are then automatically redirected to the sign-in page where they can either sign up (in case of first time users) or sign in (in case of already existing users).
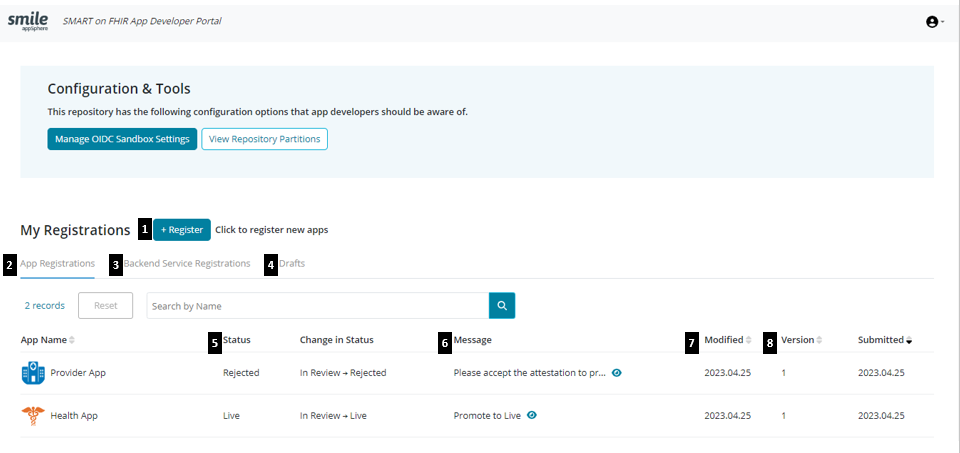
Below is a description of the UI for the Developer Portal:
- Register- Start here to register your first of many Apps, using the App registration wizard.
- App Registrations- Default tab that displays list of all registered apps.
- Backend Service Registrations - Start here to register a backend service i.e., a web service that makes pre-authorized bulk data transfers.
- Drafts- Open this tab to display list of all incomplete app registrations.
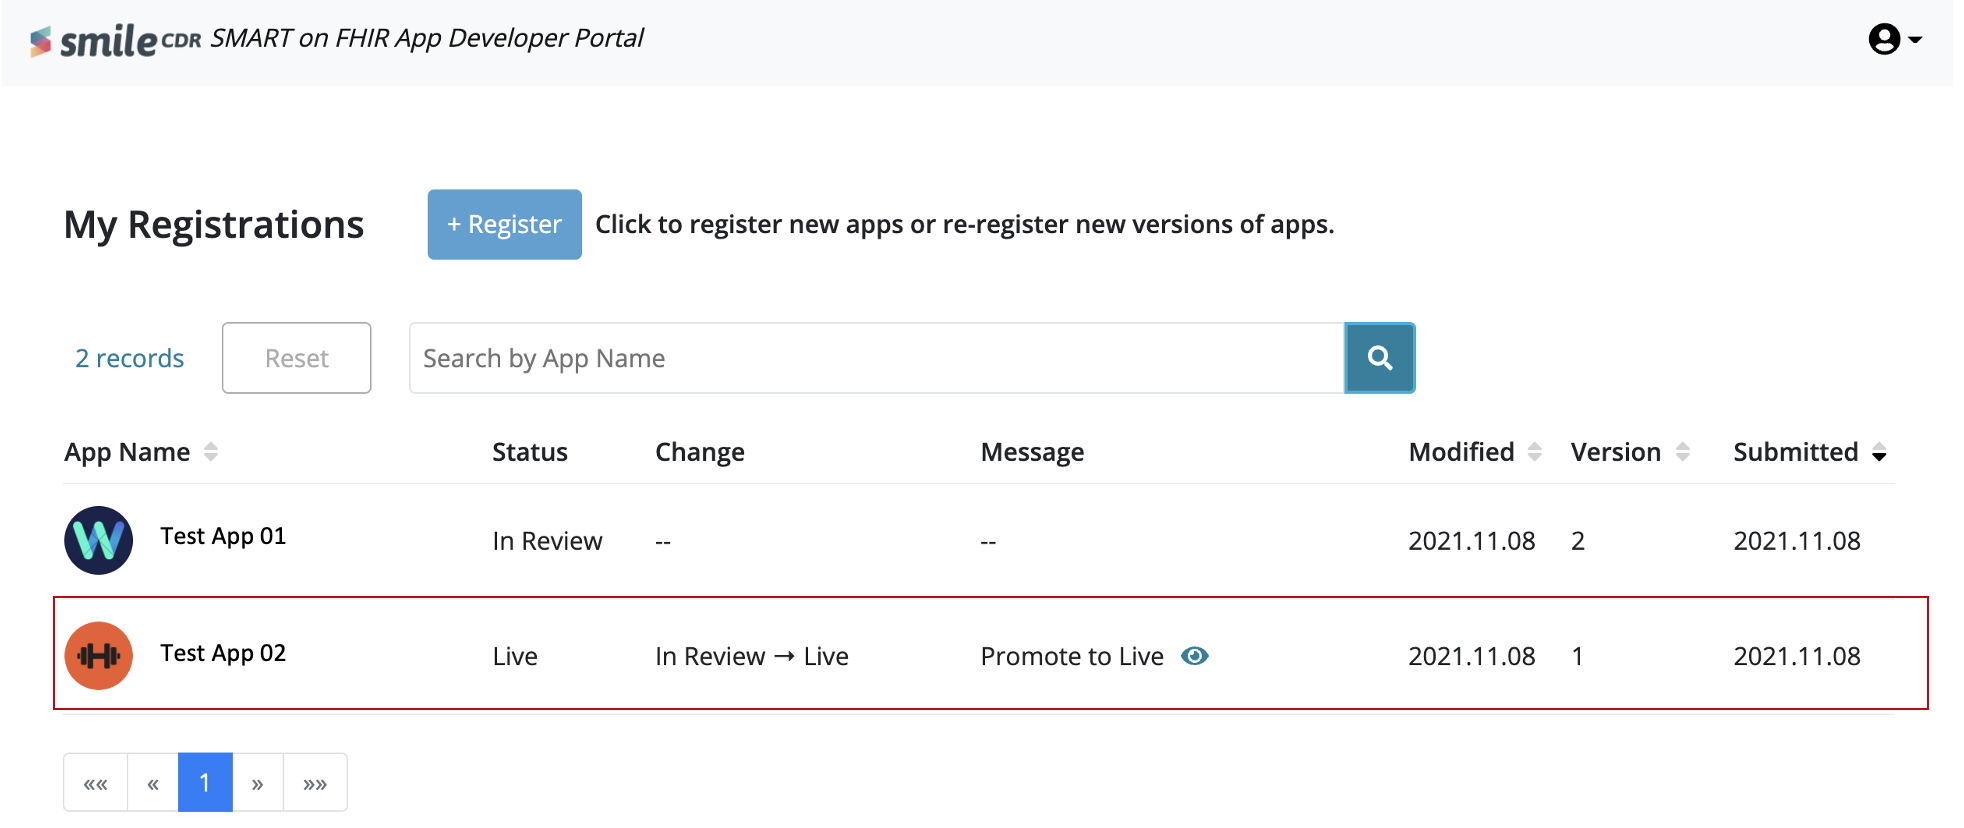
- Status- Displays the current state of the App on the system. Statuses range from:
- In Review- Waiting for a decision from reviewers on registration.
- Live- App is registered and approved to be on the App gallery, and to access required scopes.
- Rejected- An App is rejected when it does not meet the necessary requirements for approval. A rejection reason
would be sent to the developer in this event.
- Suspended- An App can be suspended by Admin if it is found to be in violation of the Terms and Conditions or
Privacy Policy.
- Retired- An App is automatically labeled as “Retired” after a new version is promoted to “Live” status.
- In Review- Waiting for a decision from reviewers on registration.
- Message- Messages posted in the audit log for an App are displayed here. This allows Admin/Reviewers to communicate with developers.
- Modified- Shows the date of the latest change of status.
- Version- The number that represents the iteration of an App that has been registered more than once.
27.5.5Sandbox Testing: UI DescriptionTrial
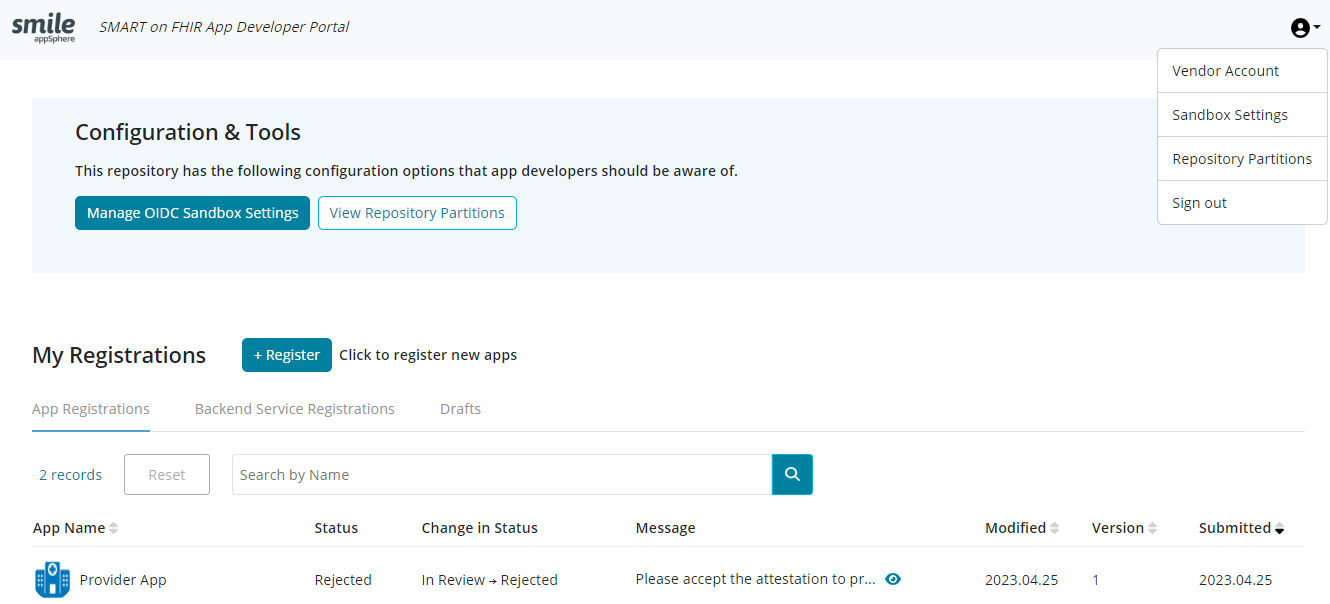
'My Sandbox' can be accessed by developers from the dev portal landing page if it has been enabled during the setting-up process (see here). Simply, click 'Manage OIDC Sandbox Settings' or select 'Sandbox Settings' from the dropdown list as shown below:
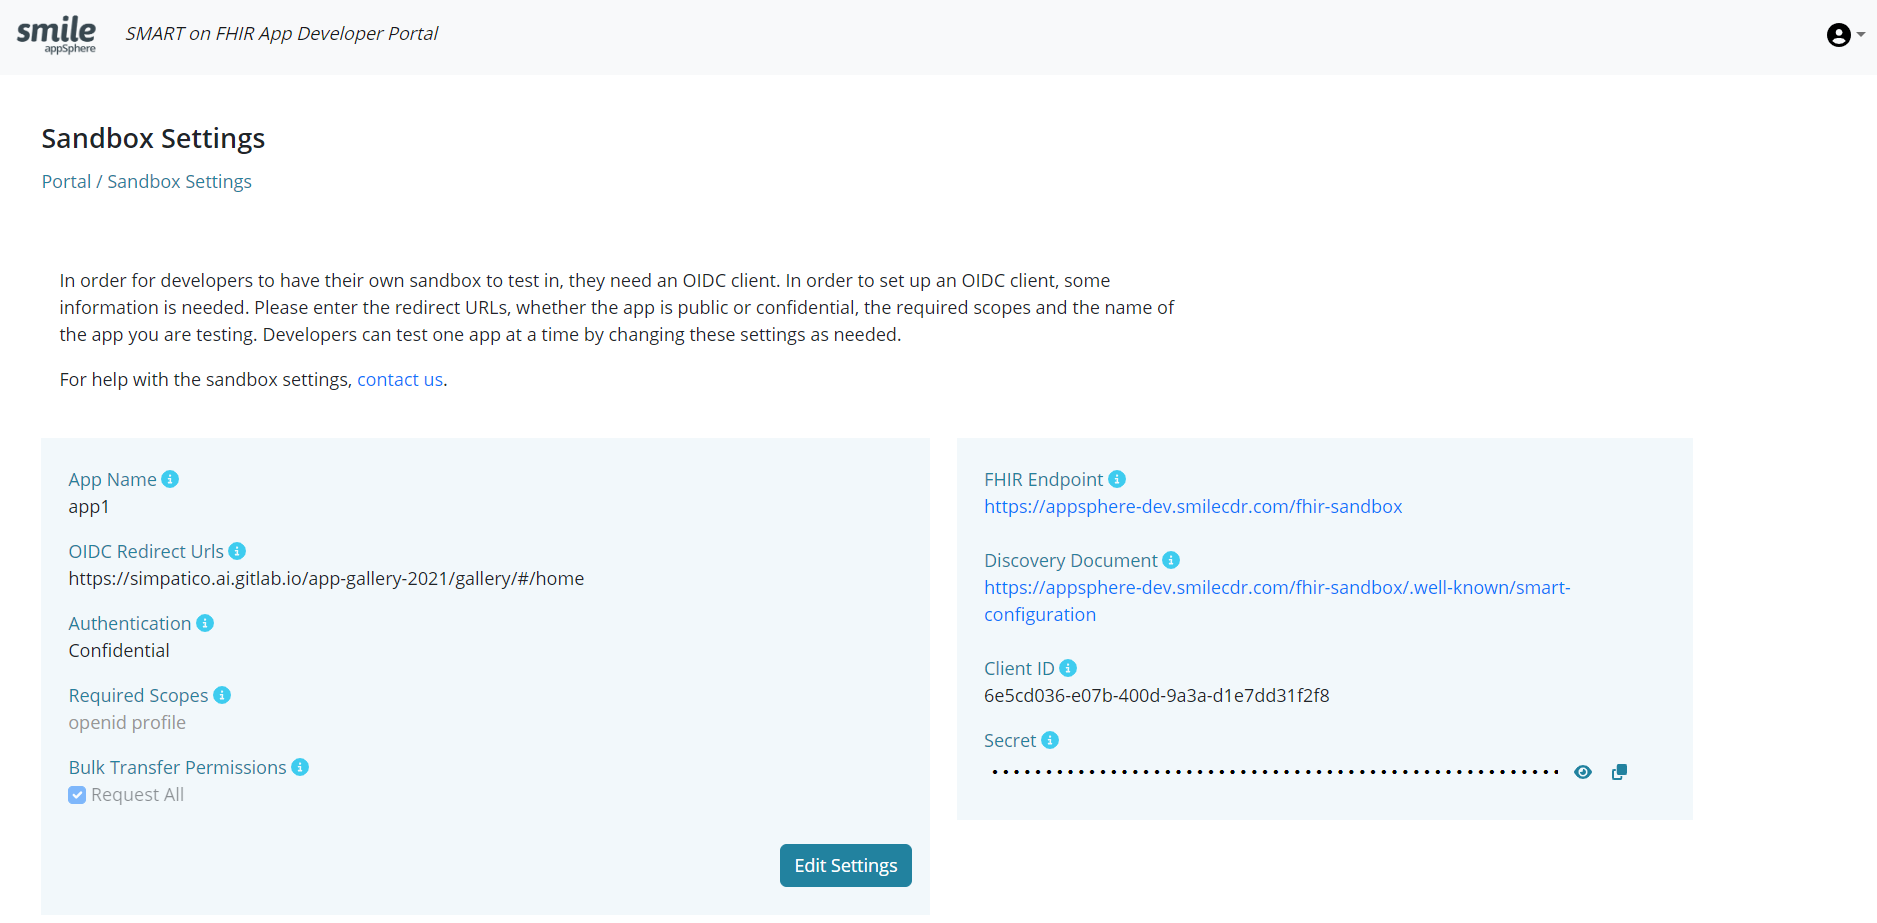
An OIDC client is needed for developers to have their own sandbox to test in. In order to set up an OIDC client, certain information is required as shown below:
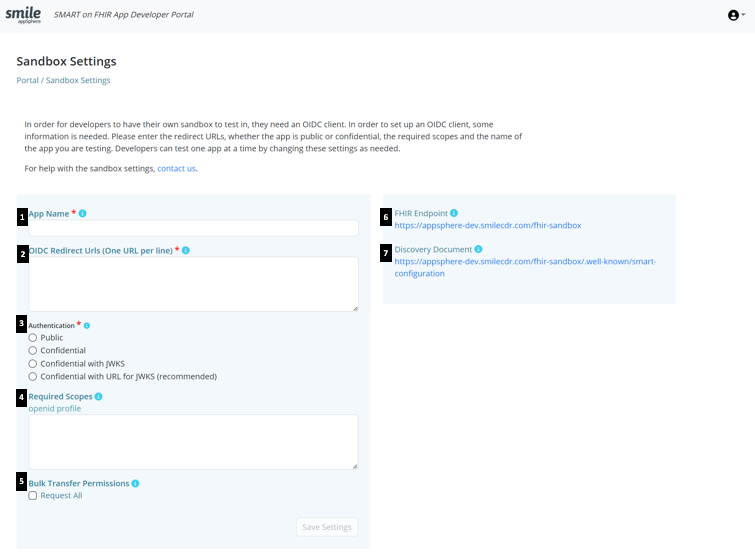
- App name: Name of the App as it appears in supported App stores and download sites
- OIDC Redirect URLs: The URLs to which users are redirected upon successful authentication
- Authentication: if the App runs in an execution environment that enables the app to protect secrets, leave at one of the confidential options (it is recommended to use the Confidential with URL for JWKS); if not, select public. Refer to JSON Web KeySet (JWKS) for more information.
- Requested Scopes: Enter the SMART scopes required for the app. Each scope should be separated by a space
- Bulk Transfer Permissions: Select the checkbox for Bulk Transfer Permissions to request transfer of all data . By selecting the checkbox for “Request All”, you would be granting permission to the app being registered to initiate a bulk export of any kind (system/group/patient). This is similar to the FHIR_OP_INITIATE_BULK_DATA_EXPORT option listed under Authorization for Bulk Export.
- FHIR Endpoint: The base URL of the FHIR server. To connect using OpenID connect, see here
- Discovery Document: FHIR Authorization Endpoint and Capabilities Discovery
- Client ID: automatically generated and can only be used by the app for testing in the sandbox
- Client Secret: automatically generated (for confidential apps) and can only be used by the app for testing in the sandbox
Developers can test one app at a time by changing these settings as needed using “Edit Settings”.
27.5.6Repository PartitionsTrial
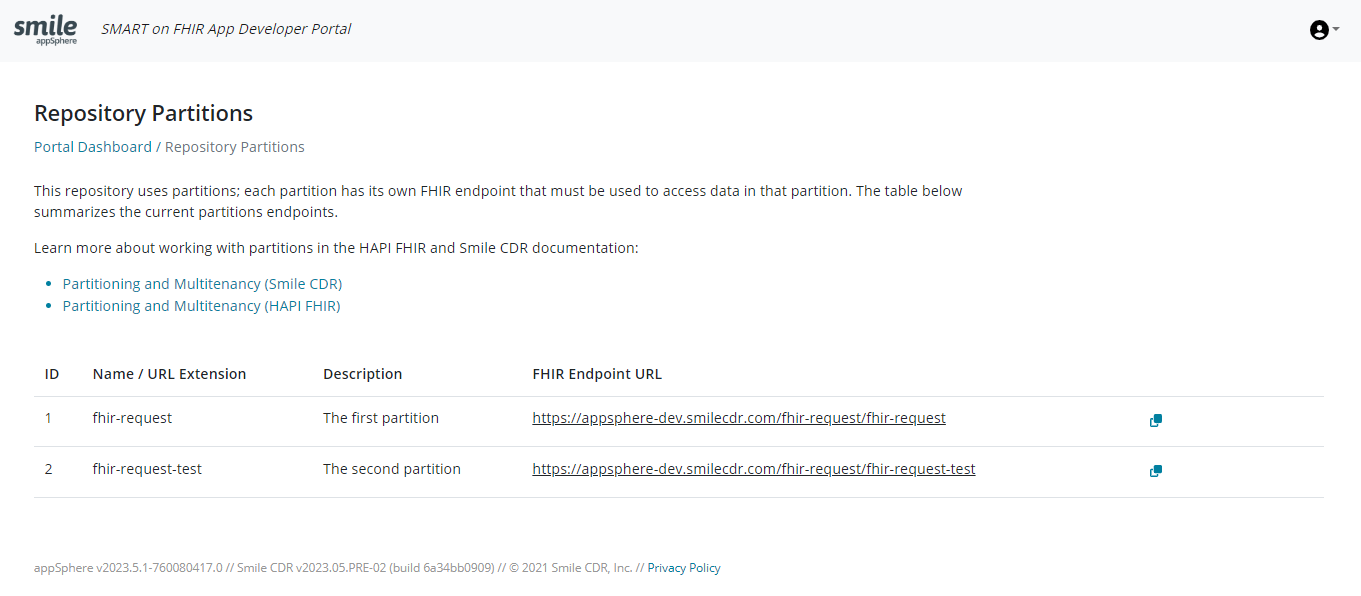
The user can click on the 'View Repository partitions' option from the dashboard to view all the partitions in Smile CDR. Each partition has its own FHIR endpoint that must be used to access data in that partition.
Please note that appSphere itself is not partitioned. Partitions occur in the core product of Smile CDR, and the developer portal can only be used to view these partitions.
Learn more about working with partitions in the HAPI FHIR and Smile CDR documentation: Partitioning and Multitenancy (Smile CDR) and Partitioning and Multitenancy (HAPI FHIR).
Note: The Permission 'FHIR_EXTENDED_OPERATION_ON_SERVER' with the argument '$partition-management-list-partitions' should be added to user account settings so that the repository partitions are visible on the developer portal. Refer to 17.4.2 Configuring Different Users for more details.
27.5.7App RegistrationTrial
The developer portal utilizes an App registration wizard built to be easy to use and provide everything a developer needs to showcase their App to the reviewers and potential consumers in the App gallery.
The 8-step process to provide an App submission request includes:
Step 1: Provide App name as it appears in supported App stores and download sites
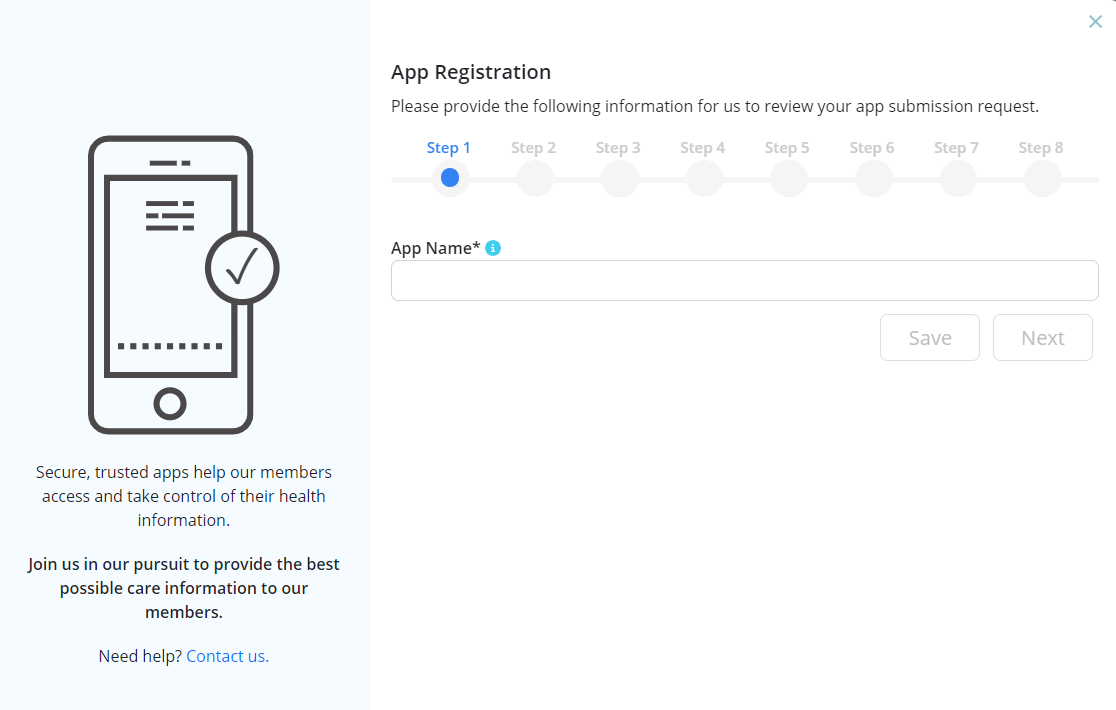
** IMPORTANT NOTE **
- App Name entered must be such that it does not fall under the following two conditions:
-
The name entered is the same as a previously submitted app (Error message displayed: <App name> is already in use)
-
The name entered is the same as an existing 'draft' registration (Error message displayed: Draft registration with name <App name> is in progress)
-
Save Step brief and link to section
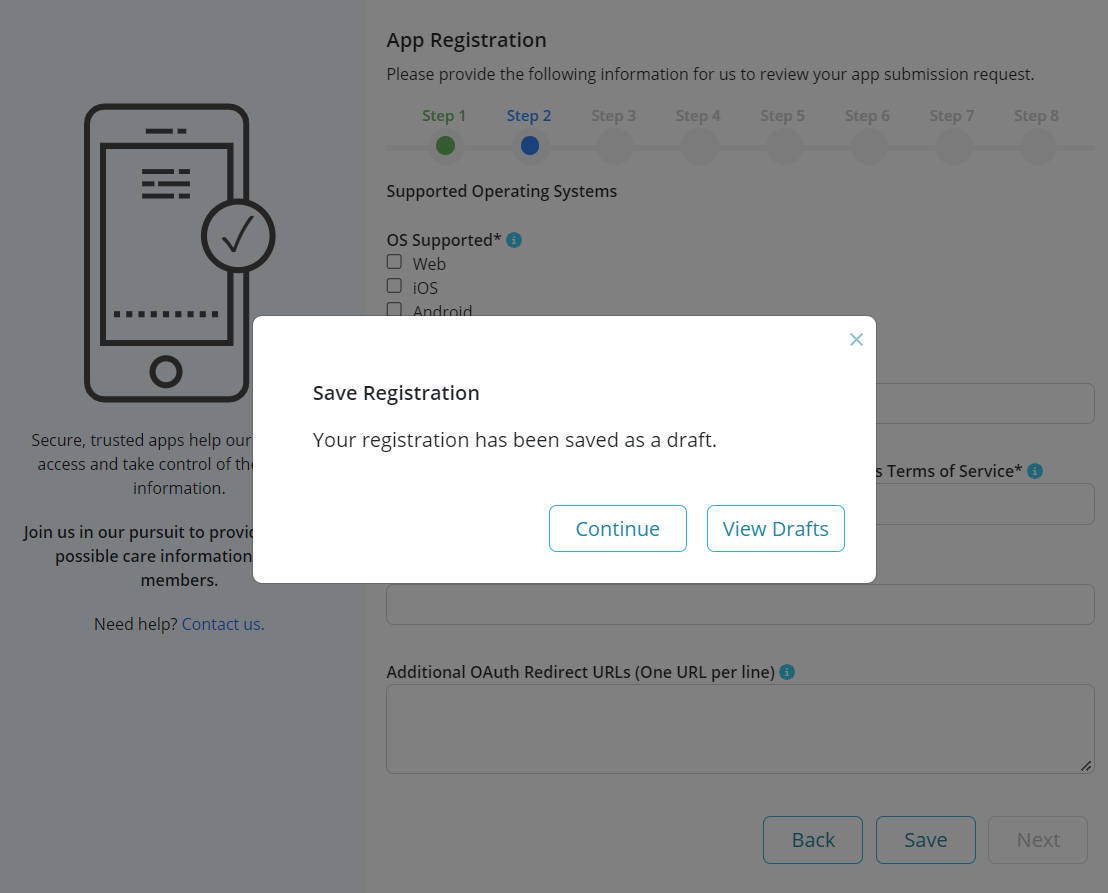
Developers have the option to save their registration as a 'draft' and complete and/or submit it at a later stage. This can be done by selecting the option to 'Save' (provided from Step 1 to Step 8) in the registration wizard.
After selecting 'Save', developers are provided with the option to either 'Continue' working on the subsequent registration steps or 'View Drafts' to be redirected to the 'Drafts' table from where the draft registration can be accessed again (see detailed instructions here).
If the developer closes the wizard by selecting 'x' at the top right corner of the wizard then the system will notify the developer about the unsaved changes and request to either 'Save' or 'Discard' the registration information before exiting.

Step 2: Select the operating system i.e., Web, iOS or Android for which the App is available and to be published in the public-facing site.
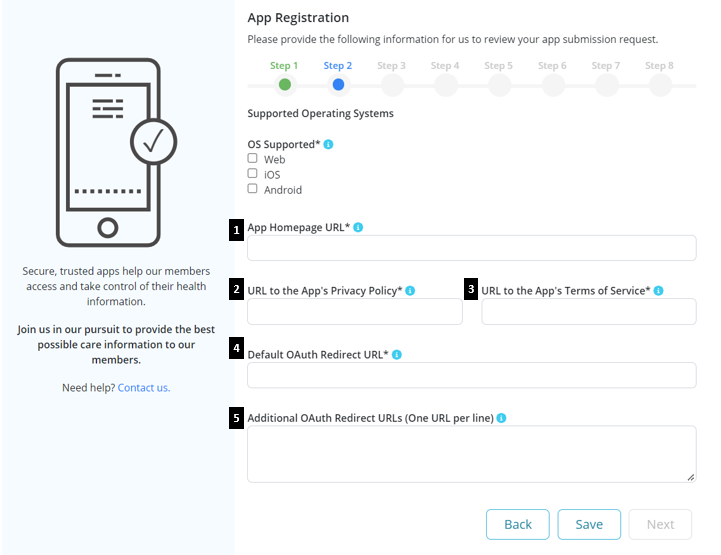
Enter the following information:
- App Homepage URL: The URL where the App's download sites can be found (note: provide homepage URL if no specific App page exists) 1. URL to the App's Privacy Policy: URL of a webpage providing the App's Privacy Policy 1. URL to the App's Terms of Service: URL of a webpage describing the App's Terms of Service 1. Default OAuth Redirect URL: URL to which developers are redirected upon successful authentication 1. Additional OAuth Redirect URLs (One URL per line): Additional URLs required for the App to work
Step 3: Provide App description for the public-facing site
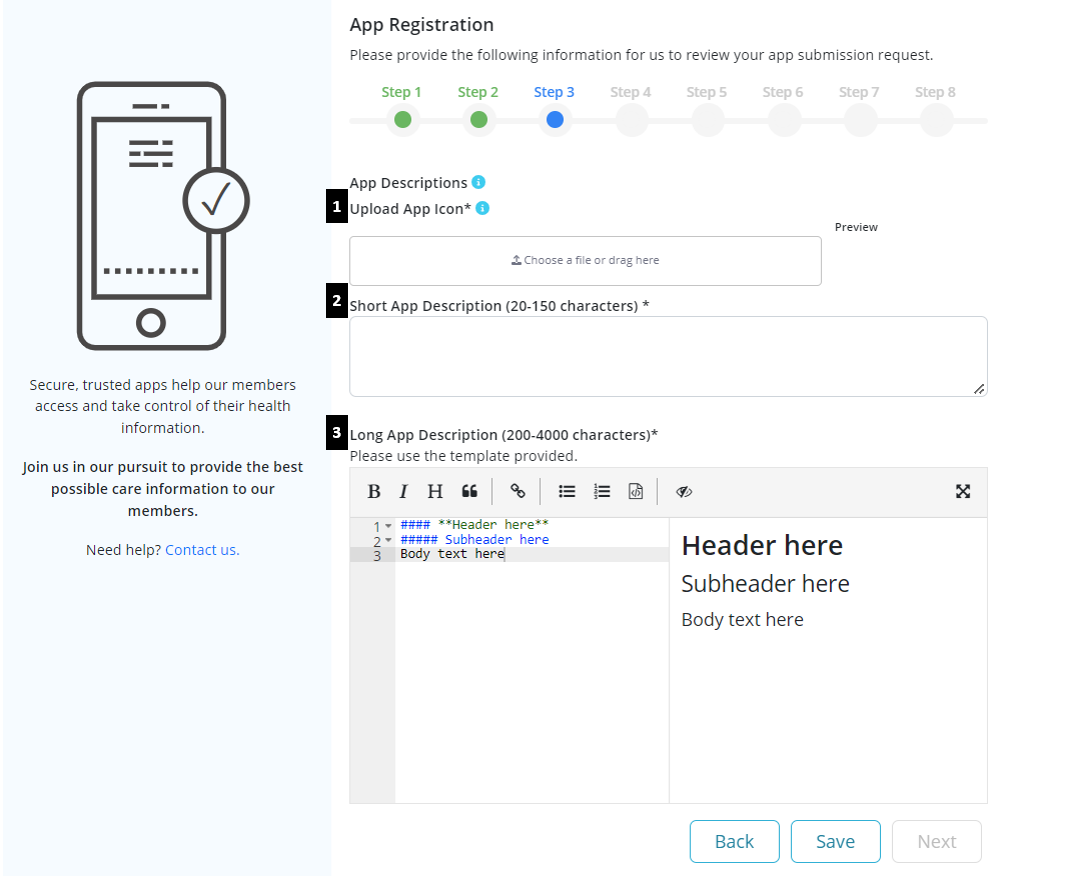
- Upload App Icon: use the guidelines from the Google Play store (link provided) to upload an app icon of the acceptable specifications.
- Short App Description: between 20-150 characters for the public-facing site
- Long App Description: between 200-4000 characters for the public-facing site. Description should be added using the markdown editor which also provides a side-by-side live preview. Learn how to use markdown here
Step 4: Select categories that apply to your App (multiple options can be selected for each category)
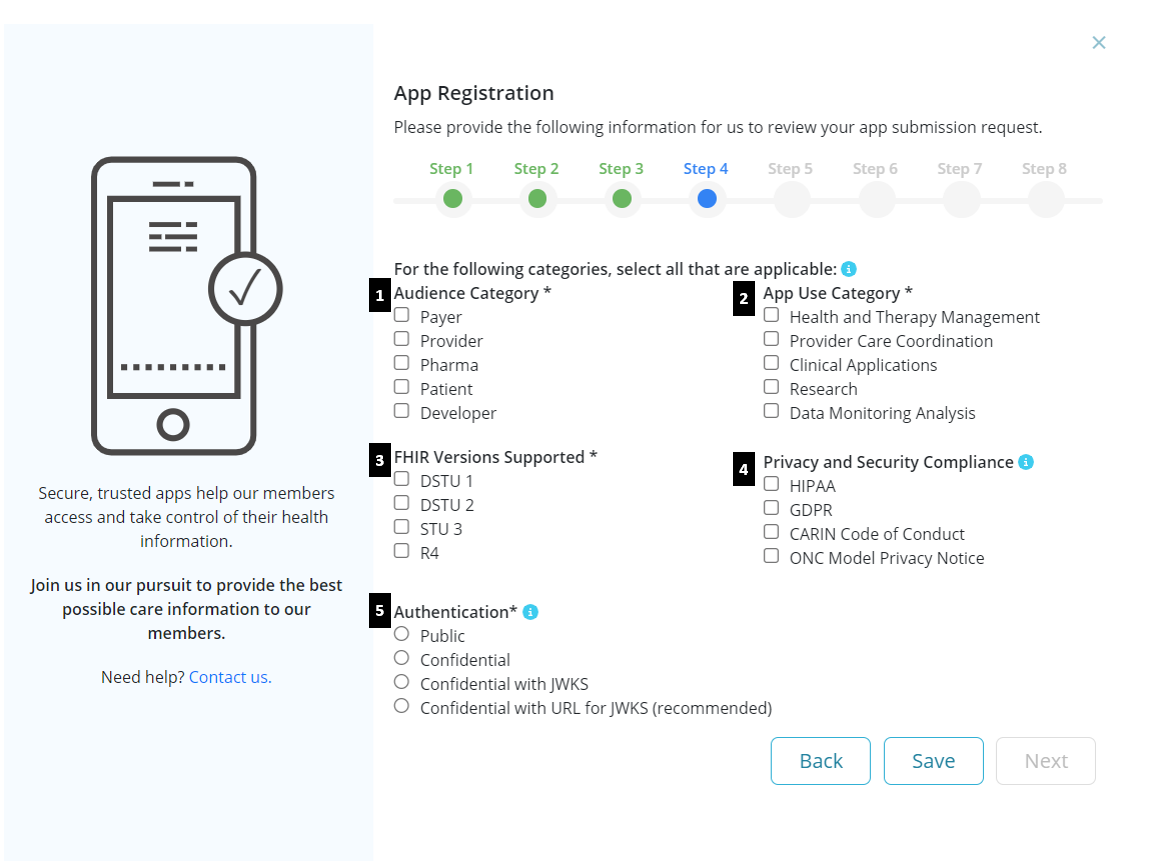
- Audience Category: options include Payer, Provider, Pharma, Patient, and Developer
- App Use Category: options include Health & Therapy Management, Provider Care Coordination, Clinical Applications, Research, and Data Monitoring Analysis
- FHIR Version Supported: options include DSTU1, DSTU2, STU3, and R4
- Privacy & Security Compliance: options include HIPAA, GDPR, CARIN Code of Conduct, and ONC Model Privacy Notice ( note: users may be asked to provide supporting documents)
- Authentication:: if the App runs in an execution environment that enables the app to protect secrets, leave at one of the confidential options (it is recommended to use the Confidential with URL for JWKS); if not, select public. Refer to JSON Web KeySet (JWKS) for more information.
In order to gain more information about public vs. confidential Apps, the user can hover over the “i” icon and select the “learn more” option that leads to the “Smart App Launch Implementation Guide” webpage. Under the “Smart App Launch Framework”, the webpage provides information on support for “public” and “confidential” Apps and when to select the private versus confidential profile for Apps. The main differentiation is based on whether the execution environment within which the App runs enables the App to protect secrets or not, in the OAuth2 sense.
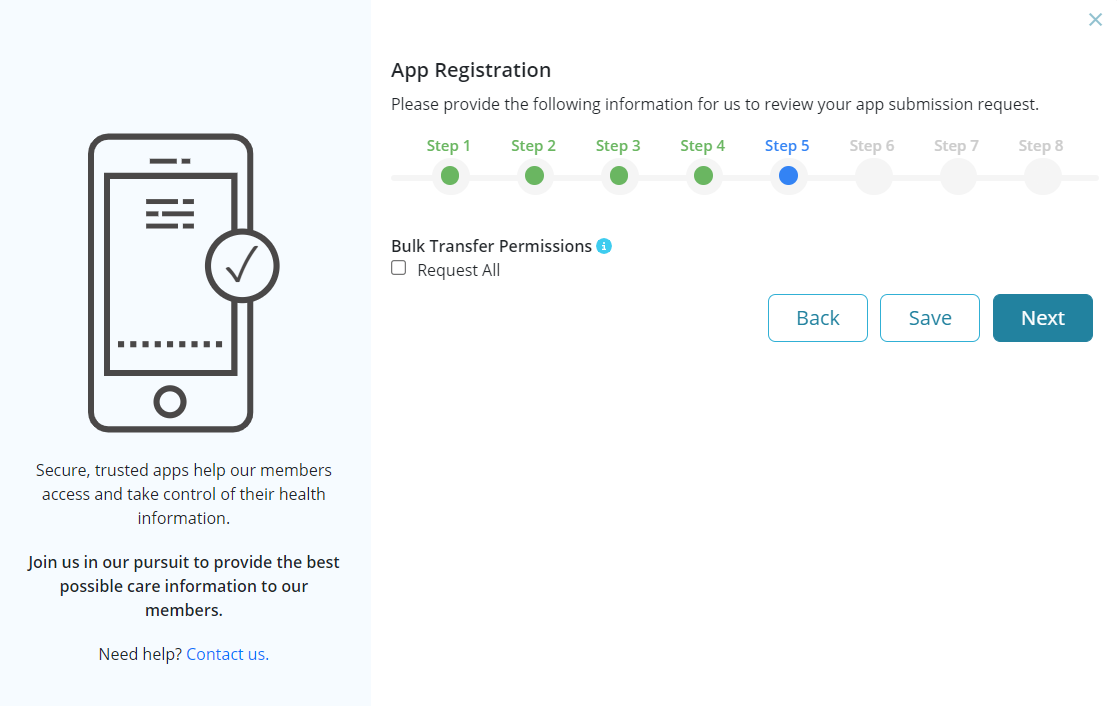
Step 5: Select the checkbox for Bulk Transfer Permissions to request transfer of all data . By selecting the checkbox for “Request All”, you would be granting permission to the app being registered to initiate a bulk export of any kind (system/group/patient). This is similar to the FHIR_OP_INITIATE_BULK_DATA_EXPORT option listed under Authorization for Bulk Export.
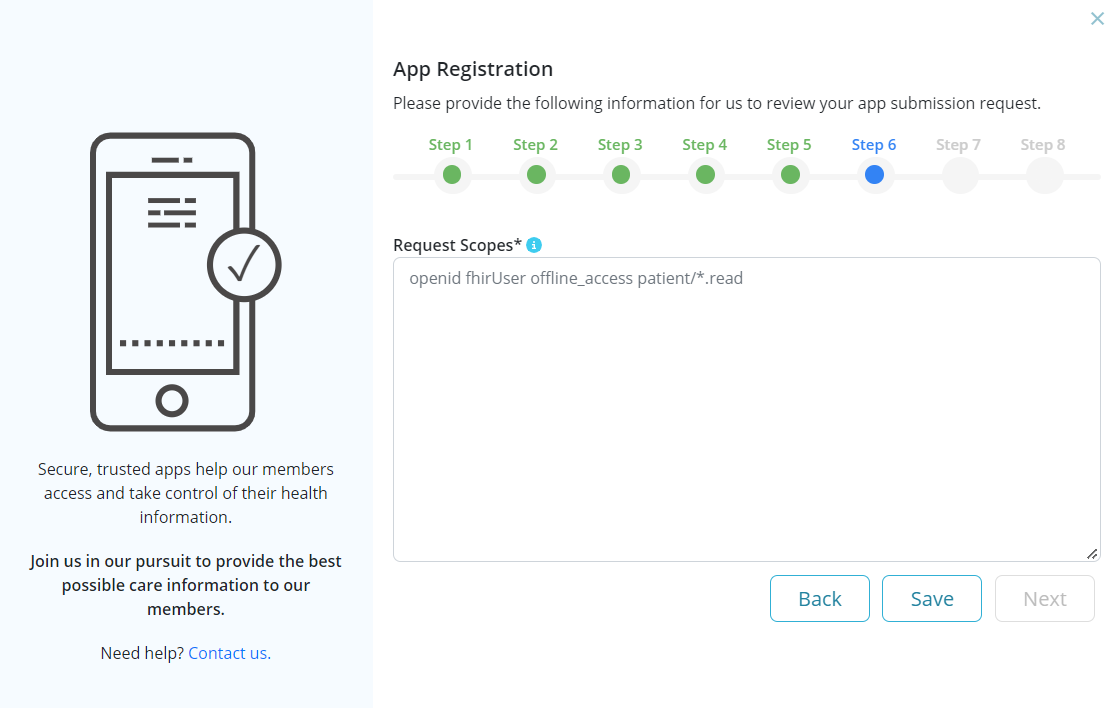
Step 6: Enter scopes to request app permissions (note: link is provided for more information on SMART App Launch: Scopes and Launch Context)
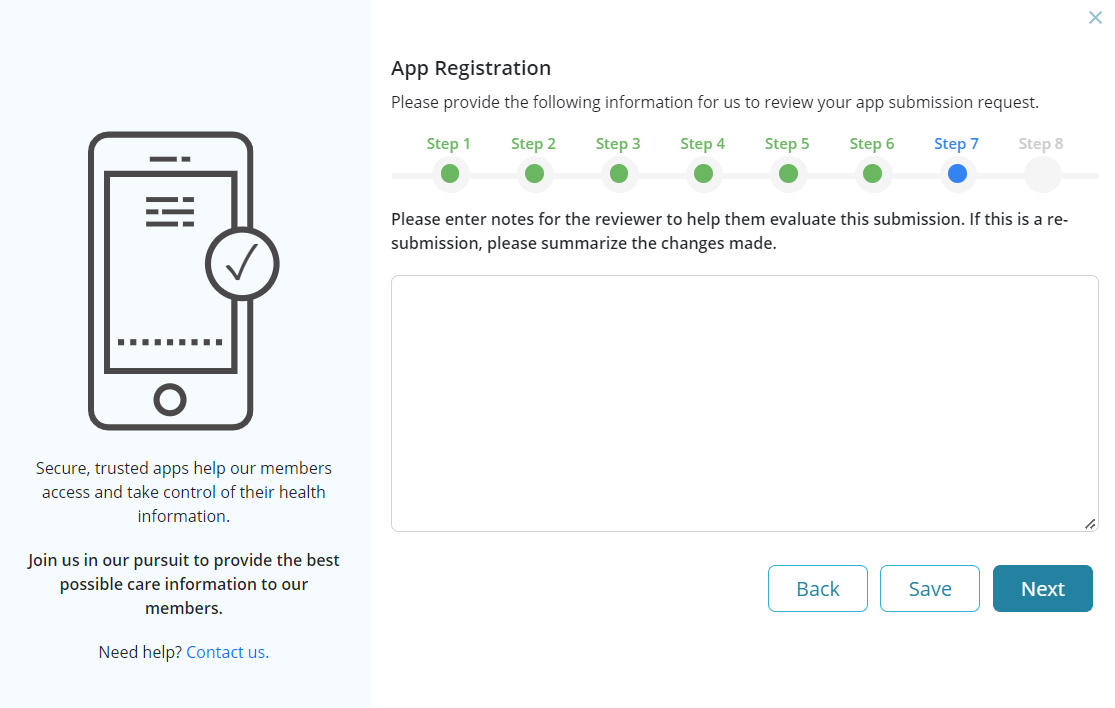
Step 7: Option to enter notes for the reviewer to help in the evaluation of the submission. If a re-submission is provided, then users are required to summarize the changes made.
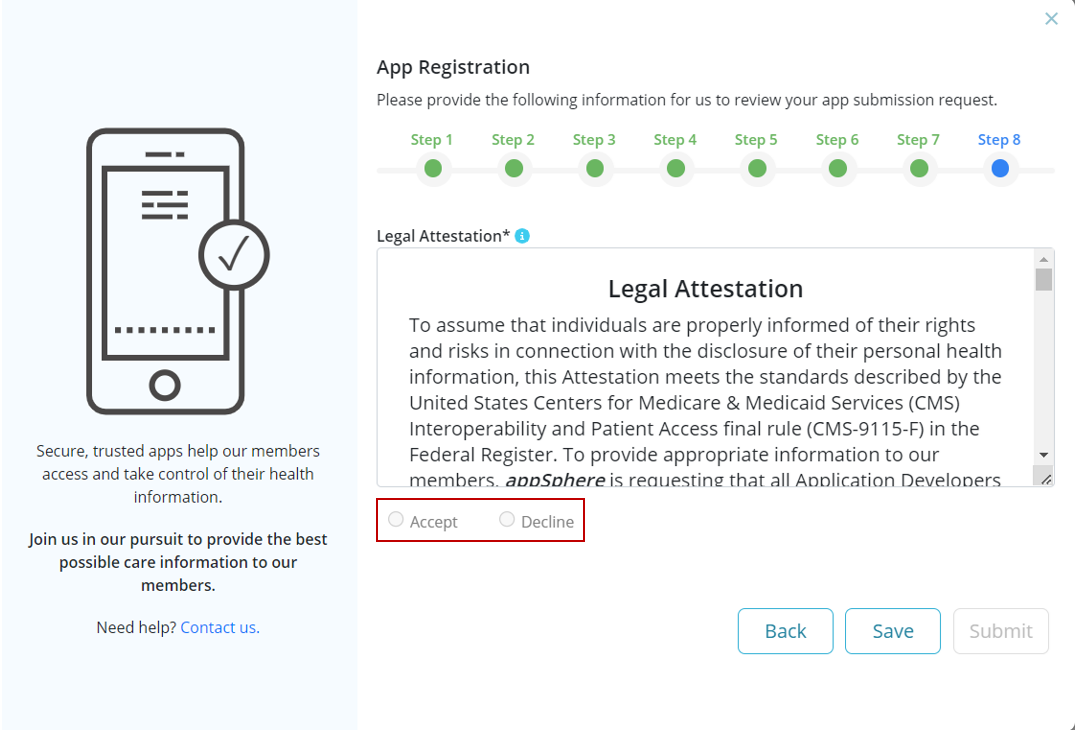
Step 8: Review legal attestation and either accept or decline adherence to the terms that describe the minimum privacy and security criteria to sufficiently protect patients' protected health information in accordance with the CMS and ONC.
** IMPORTANT NOTE **
In compliance with regulations, a developer may decline the terms and still successfully register the app. However, refusing the attestation terms will result in the display of a warning to patients both in the App Gallery as well as after patient authentication. Patients will be informed explicitly of the risks involved in using apps where the developer has declined the attestation terms and have the opportunity to refuse consent to the app during the OAuth process.
Once the 8-step process to provide an App submission request has been completed, the App will be sent for review. The status of the App submitted for review can be seen by developers under 'Finished Registrations' in the developer portal.
27.5.8Managing 'Draft' App Registrations and Re-registrationsTrial
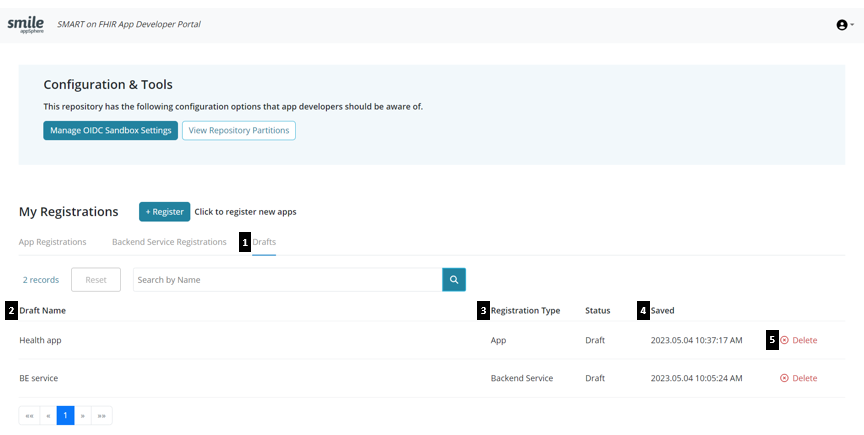
appSphere also provides the option for developers to save incomplete registration information so that they do not have to re-enter information if they need to come back later (see here under Step 1). The following steps provide detailed instructions on accessing 'draft' registrations and re-registrations when developers return to the Developer Portal at a later stage.
-
Select the 'Drafts' tab from the landing page in the Developer Portal
-
Click on the relevant App or Service name from the list of drafts to open the registration wizard. The wizard will display the last saved information for developers to make required changes/additions. Any changes/additions made can then be saved again or the completed registration can be submitted for review.
** IMPORTANT NOTE **
App name field will be disabled in the case of a 'draft' re-registration to indicate which App is being re-registered.
-
View the registration type - whether it is as an app or a backend service.
-
View the most recently updated App on top of the list under the 'Saved' column with the date and time displayed.
-
'Delete' any existing 'draft' registrations as required.
27.5.9App Information PageTrial
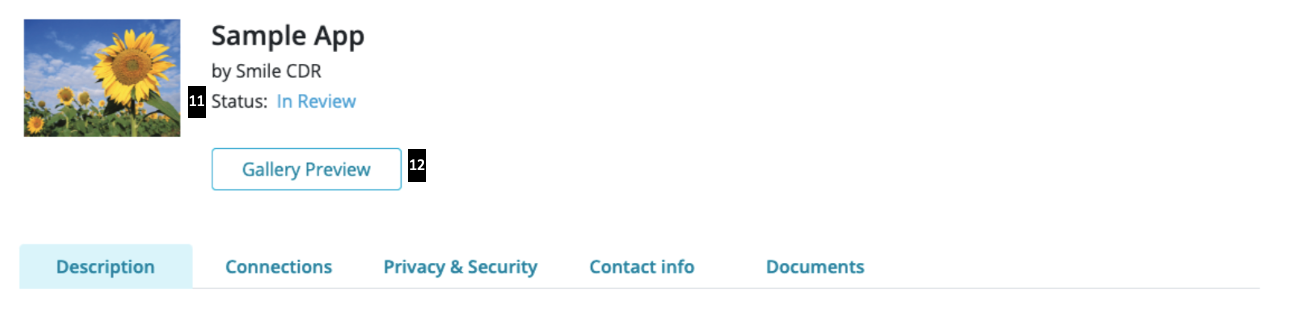
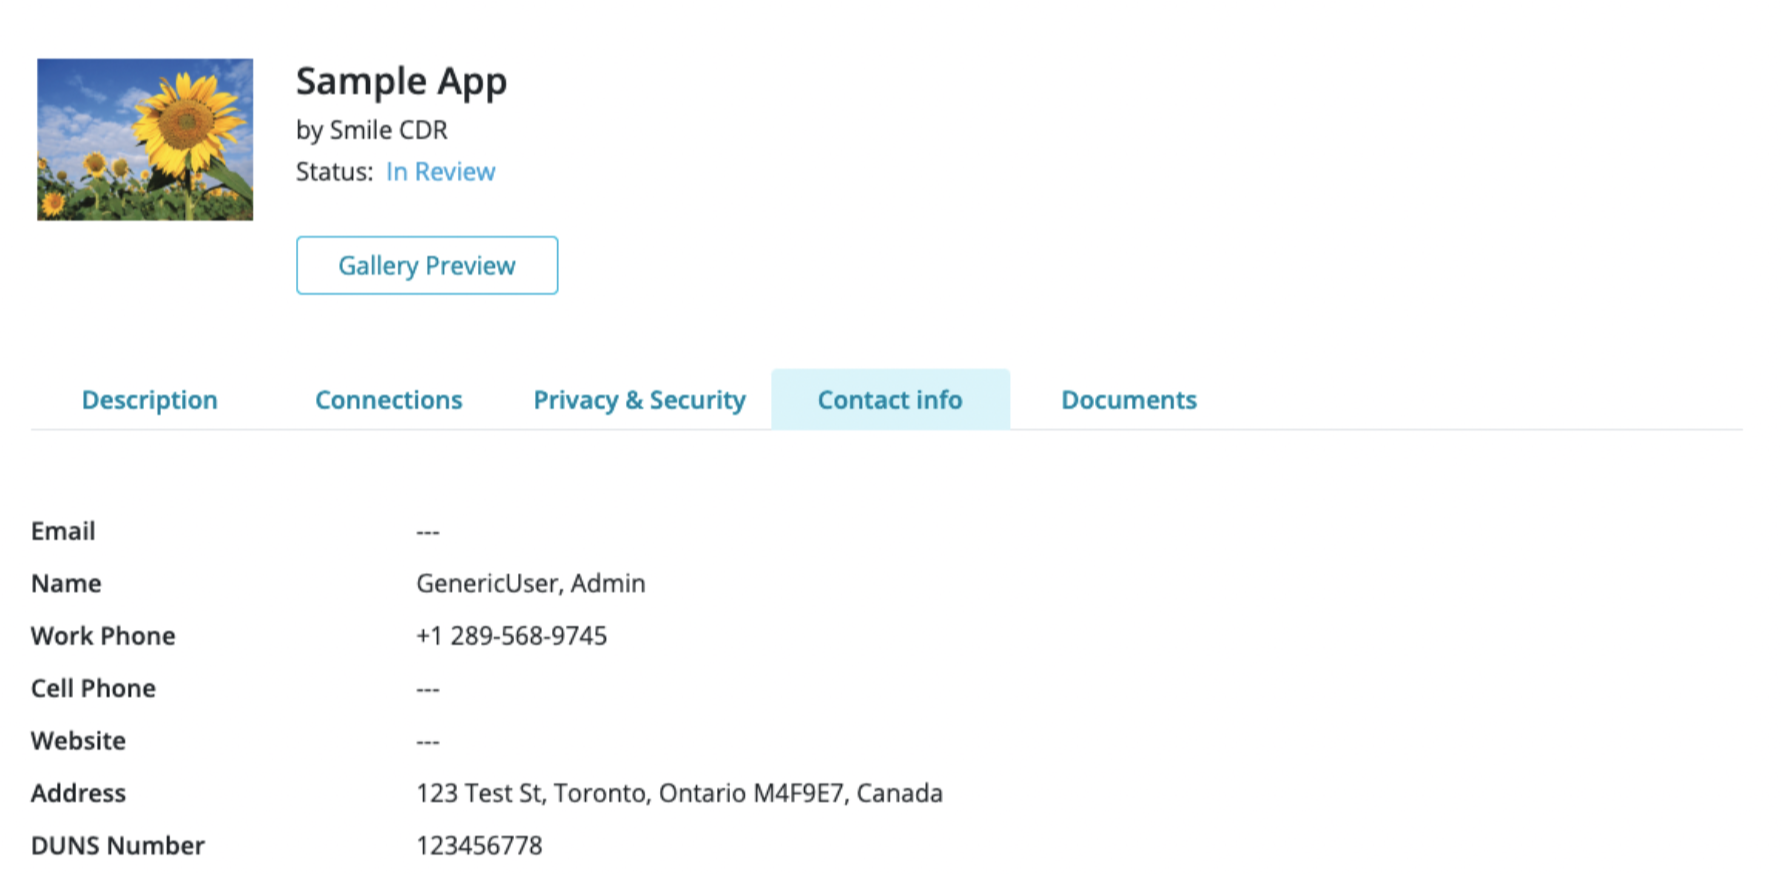
The App Information Page is available for finished registrations and can be accessed by selecting the App name from the list under 'My Registrations'. It will contain all the information submitted by the developer at the time of registration. The information submitted will be categorized and made available under 'Description', 'Connections', ' Privacy & Security', 'Contact info', and 'Documents' as shown below.
27.5.9.1Description
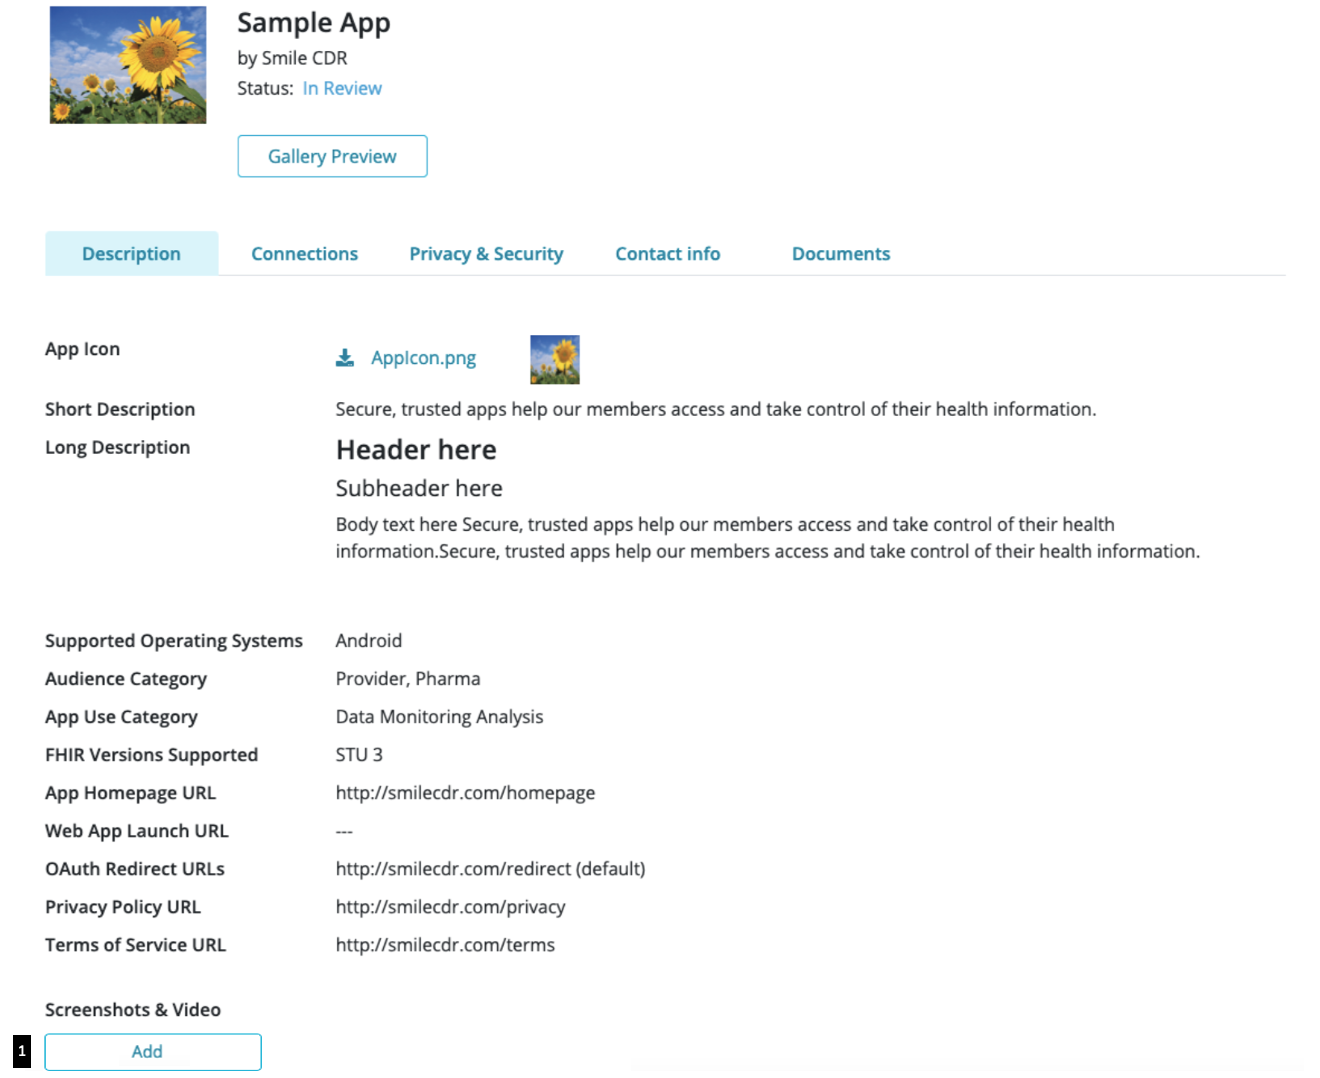
The 'Description' tab also provides developers the option to submit assets (i.e. screenshots and/or video) for their App. Under the 'Screenshots & Video' category, the following options are available to upload and submit assets:
- Add: select to access the options available to add screenshots and a video of the submitted App
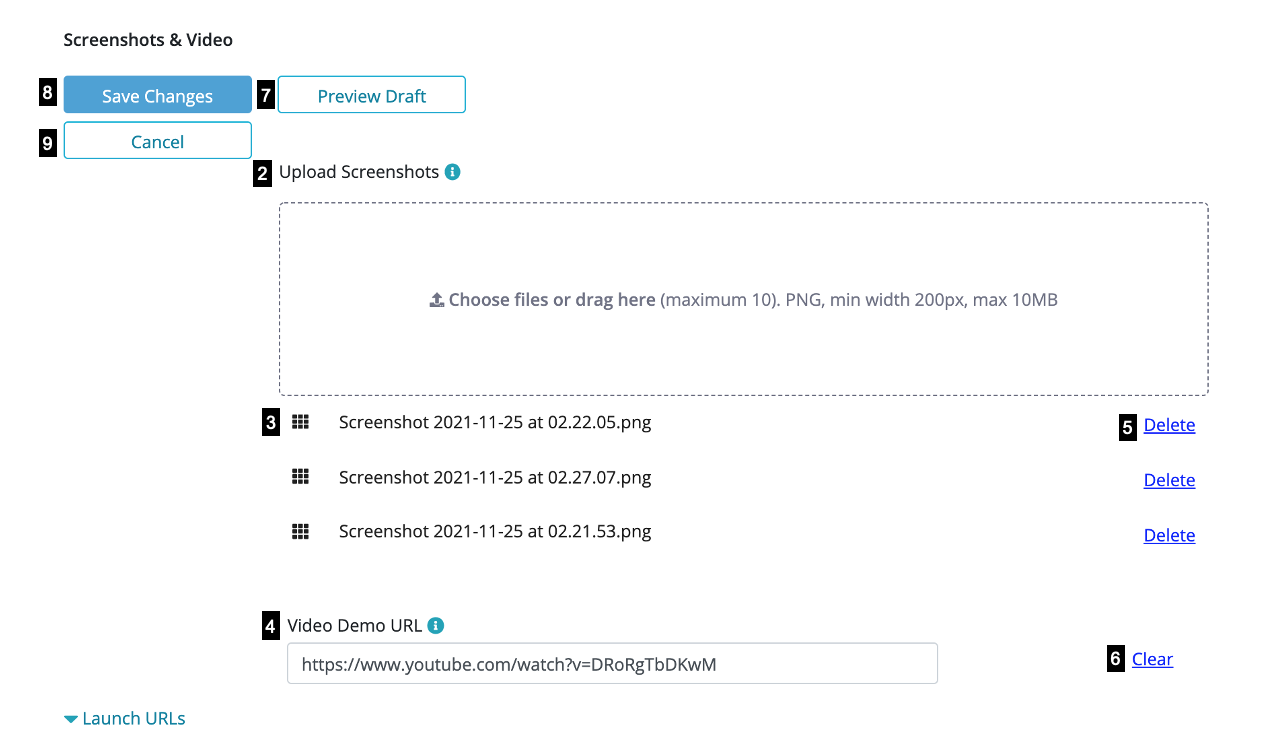
- Upload Screenshots: select files from your computer or drag and drop to upload (note: a maximum of 10 screenshots can be uploaded. Screenshots must be in PNG format with a minimum width of 200 pixels and maximum size of 10MB) 1. File name: name assigned to the screenshot based on how it is saved on your computer. The top most file in the list will appear first in the App Gallery and each file from the list can be dragged to reorder based on preference (note: files with the same name cannot be uploaded and the file name should not exceed 50 characters) 1. Video Demo URL: enter a Youtube or Vimeo URL in the field provided to upload a demo or trailer of the App submitted (note: only Youtube or Vimeo links are accepted) 1. Delete: select to remove uploaded screenshots 1. Clear: select to delete the URL entered 1. Preview Draft: option to view changes made in 'Edit' mode prior to selecting 'Save'
- Save Changes: once selected, uploaded assets (screenshots and/or video) are saved and assigned the status of ' In-Review'
- Cancel: select to exit from 'Edit' mode without saving any changes
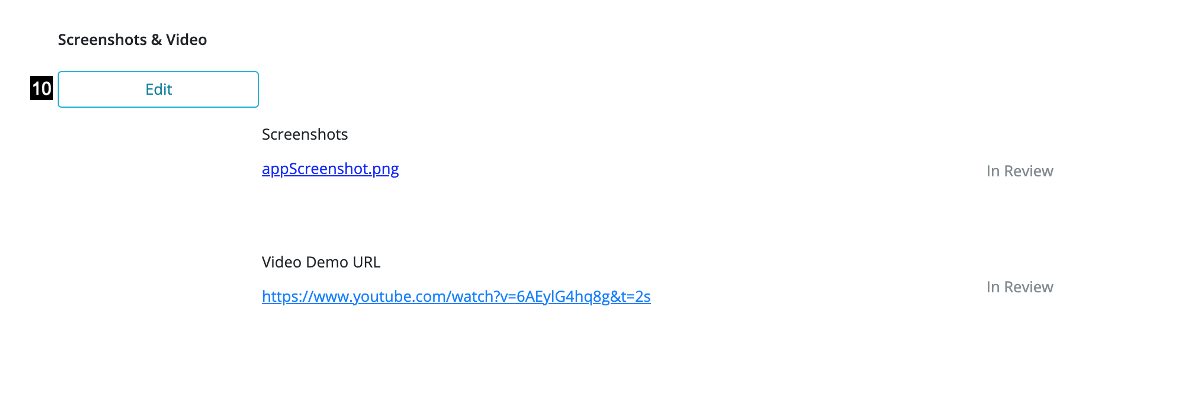
- Edit: select to make subsequent uploads or to make changes to existing uploads (note: edits made after receiving an 'Approved' status, such as deleting screenshots and/or video or reordering uploaded screenshots will apply directly to the App Gallery without the need for admin approval)
- Status: app status can be viewed by developers after submission and will change based on the admin's action
- Gallery Preview: select to view approved assets (screenshots and/or video) based on how they would appear in the App Gallery
** IMPORTANT NOTE **
Assets cannot be uploaded for "Rejected" or "Retired" Apps as those are terminal states.
27.5.9.2Connections
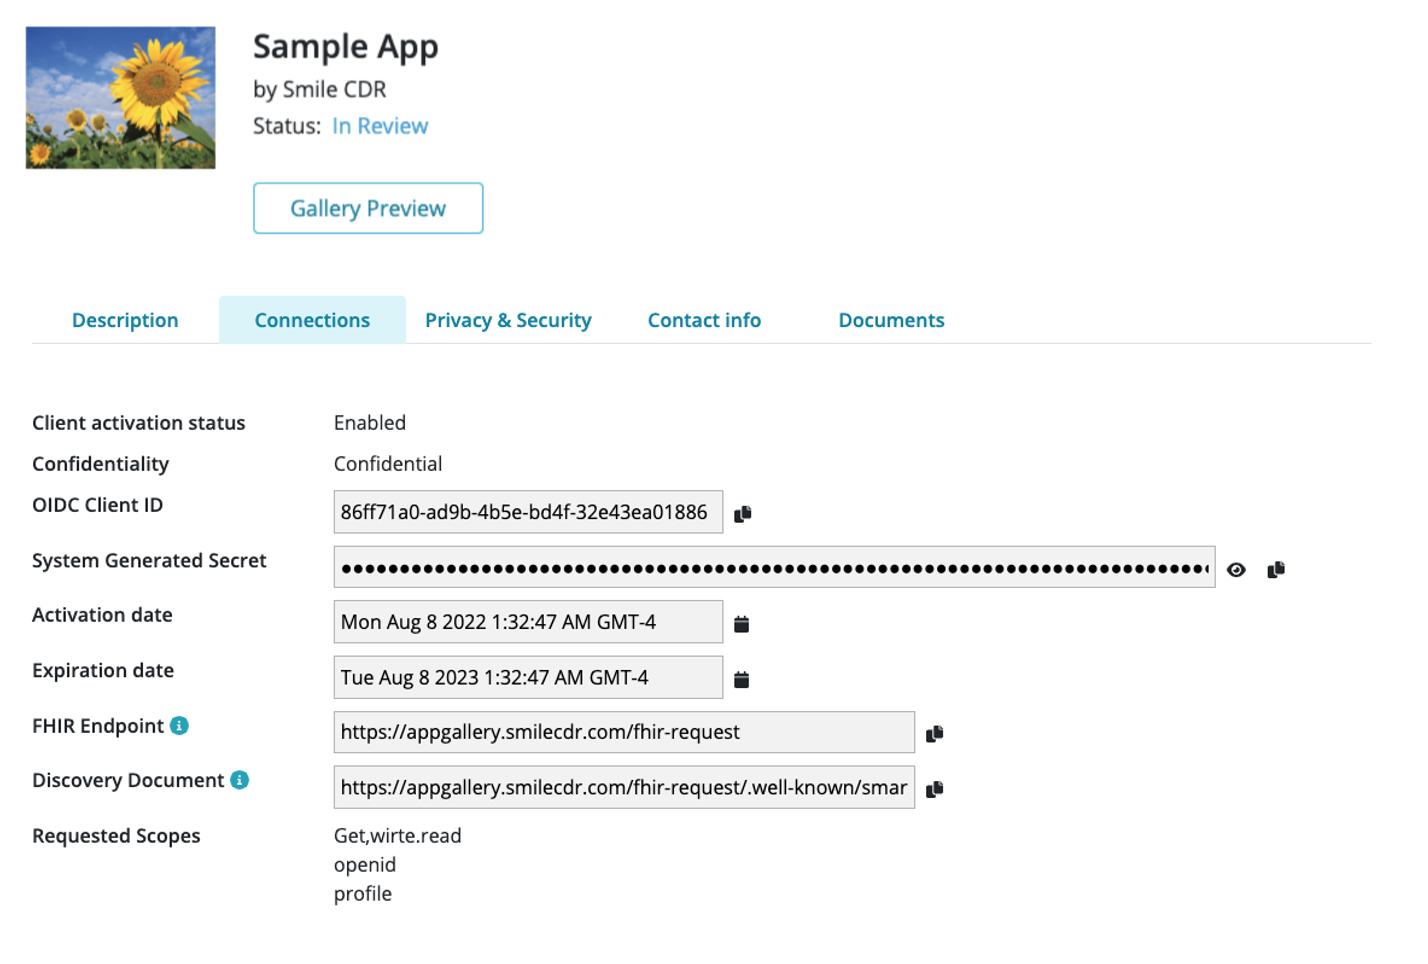
The "System Generated Secret", "Activation Date" and "Expiration Date" will not be included for public apps (see here).
27.5.9.2.1Registered App Checklist
The 'Connections' tab can be viewed to check if the following have been assigned:
- OIDC Client ID (randomly generated)
- System Generated Secret (randomly generated, only available for confidential apps)
- Requested Scopes (as provided from registration, along with default scopes)
- FHIR Endpoint (e.g., https://try.smilecdr.com/baseR4); if multiple partitions, this endpoint is unique for each partition
- Discovery Document (see here for FHIR Authorization Endpoint and Capabilities Discovery)
27.5.9.3Privacy & Security
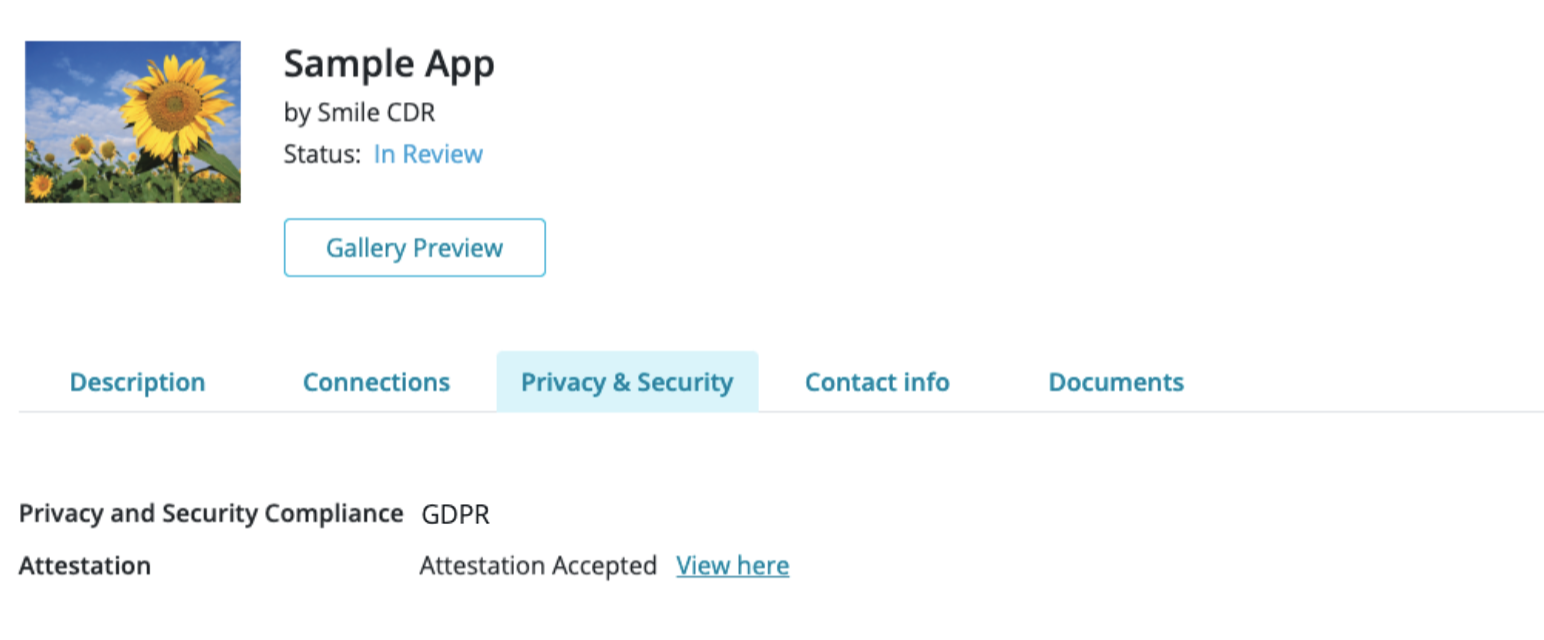
See here for more information on attestation & managing attestation documentation.
27.5.9.4Contact Information
27.5.9.5Documents
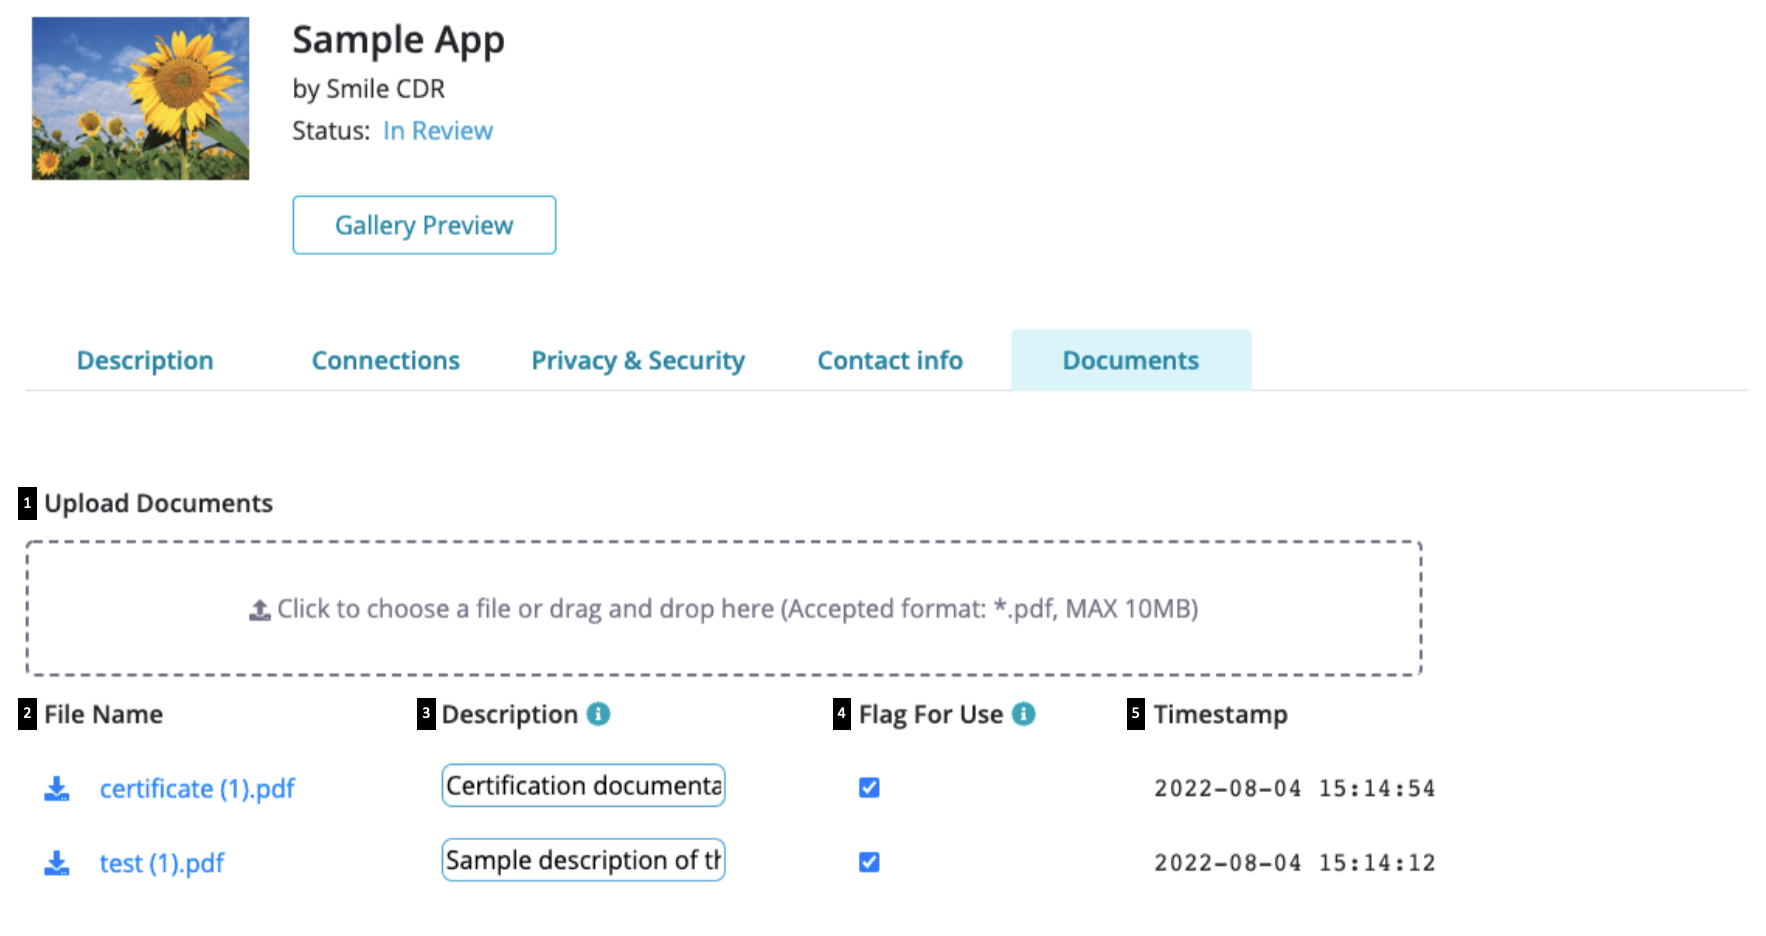
The 'Documents' tab is available for developers to submit documents that support their submission for registration.
Once, 'Documents' is selected, the following options are made available for document uploads:
- Upload documents: documents can be uploaded by clicking to select files from your computer or by dragging and dropping files (note: documents should be in .pdf format, and the maximum file size accepted is 10MB. A warning sign will appear if 4 or more documents are being uploaded together as this might slow down the process).
- File name: name given to the document uploaded based on how it is saved on your computer. Once the upload is successful, documents can also be selected from this list to be downloaded
- Description: an option to add a description for the uploaded document (note: the description should not exceed 200 characters).
- Flag for use: once a document is successfully uploaded, it is flagged/checked by default to inform the reviewer that it is 'ready for viewing'. The checkbox can be unchecked for any old or obsolete documents
- Timestamp: provides a log of the date and time for all uploads made
** IMPORTANT NOTE **
Documents cannot be uploaded for "Rejected" or "Retired" Apps as those are terminal states.
27.5.10AttestationTrial
Developers are asked to attest that their App has privacy and security policies that meet or exceed the minimum standards required to protect a patient's private health information.
To comply with regulations set by the CMS and ONC, app developers are allowed to decline the attestation terms and still register their App. Apps that have refused the attestation will be labeled in the App Gallery to warn potential users against its use. Additionally, patients are made aware of the risks of using these potentially harmful apps during the authentication process.
27.5.10.1Attestation Documentation
The attestation document for each App can be accessed from an App's information page.
- Select the App from the registered App list
- Select the “Attestation document” link from the information page
- A separate window or tab will open displaying the document.
- Print or save to pdf through the browser print console for your records.
Each attestation document will be electronically signed with the developer's: Legal name, Position/ Designation, Legal business name and Date of attestation.
27.5.10.2Managing Updated Attestation Documents
Developers are required to re-attest when they update any information about their account settings in the 'edit profile' section or when the attestation documents are updated. Developers will be notified of updated attestation via two methods. An email will be sent to their registered email address for the App, and a notification will be displayed next to the App on the Developer portal.
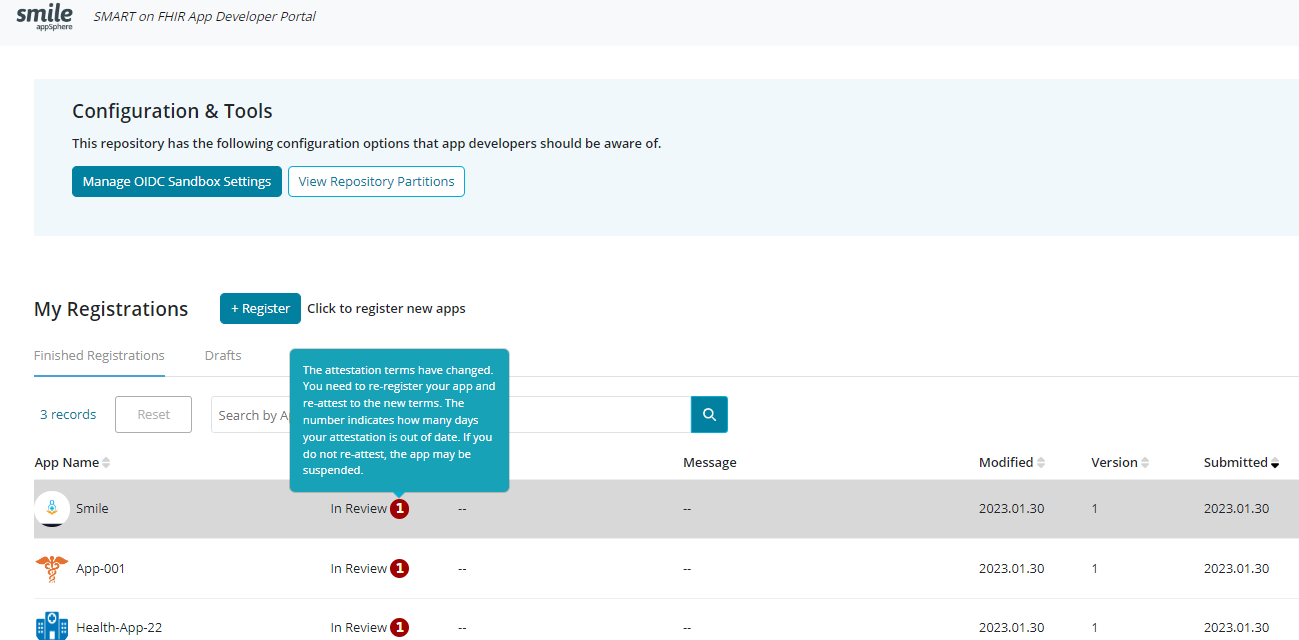
The notification shows how many days has passed since the attestation document for an App has been out of date. Hovering over the notification displays a pop-up message asking the Developer to re-register the App and accept the updated attestation. Developers can re-register their App by using the App registration process, as shown in the next section.
If the attestation expired and the developer has not reattested after 7 days have elapsed, then they will receive a warning email. They will continue to receive the warning emails every 7 days until they re-attest.
27.5.11New App versionsTrial
A developer can register a new App version by selecting the 'Re-Register' button available on the 'App Information Page' that is accessible by selecting the appropriate App name from the list of 'Finished Registrations'.
** IMPORTANT NOTE **
The 'Re-Register' button will only be available for the most recently submitted version of an App, whose status is either 'Live' or 'Rejected'.
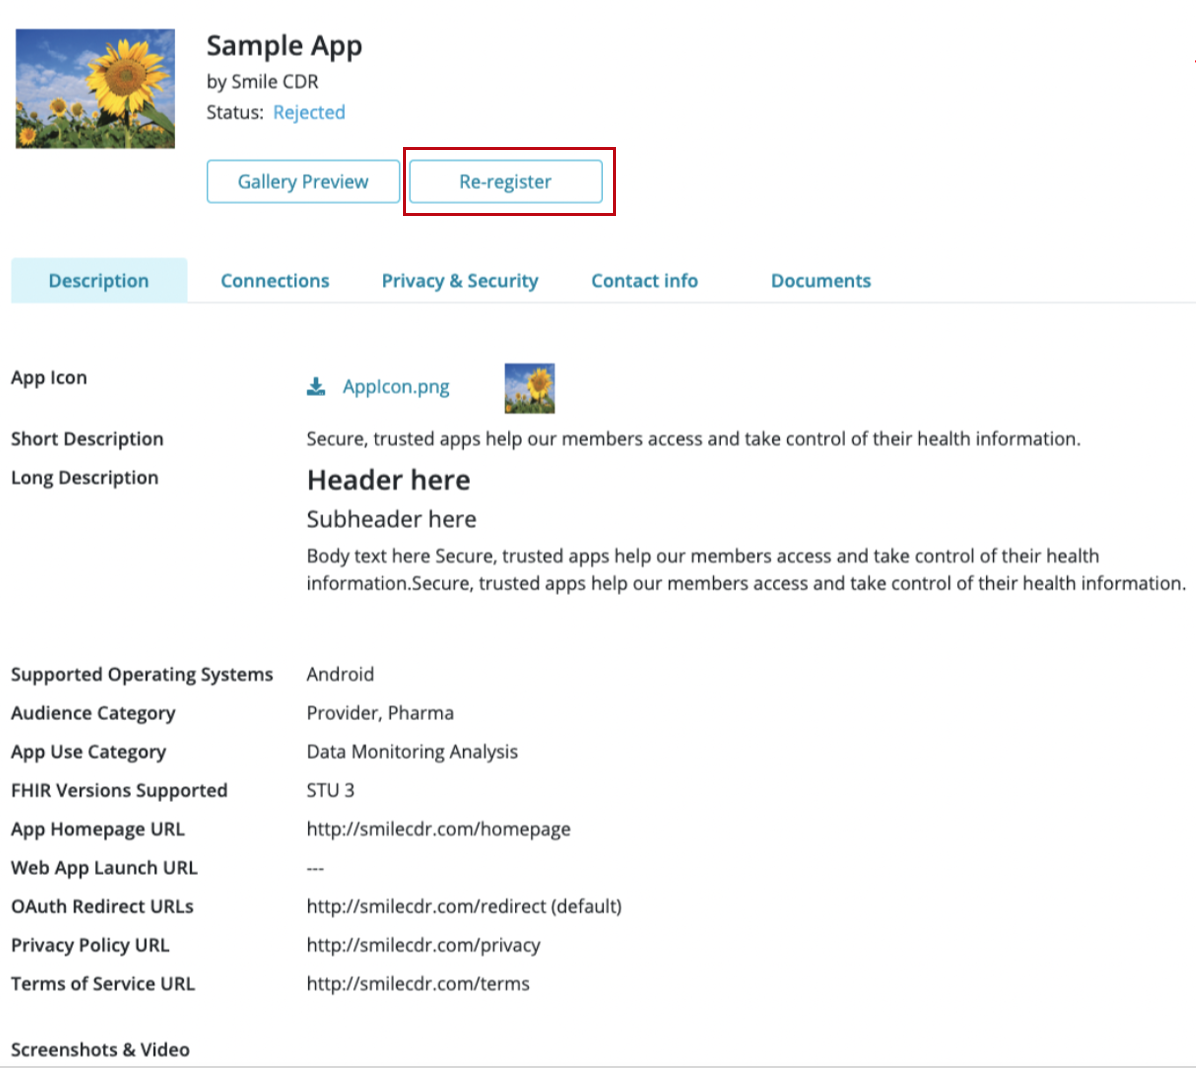
Selecting the 'Re-Register' button would open the registration wizard with the App name fixed to indicate that it is re-registration for that particular App, and will allow developers to edit the other existing information to suit their new version. This makes it easier for developers to keep the standard information while making the necessary changes.
A "Change Notes" section is also provided in Step 6 of the registration wizard to allow developers to summarize any changes made in the App to help expedite the review process.
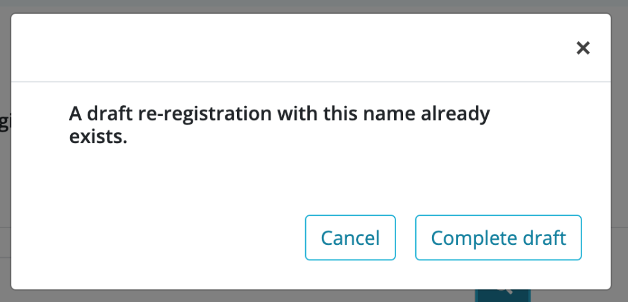
** IMPORTANT NOTE **
If a developer follows the aforementioned method to access a 'draft' re-registration a notification message will appear to indicate that a 'draft' already exists and can be accessed to make changes and complete/submit.
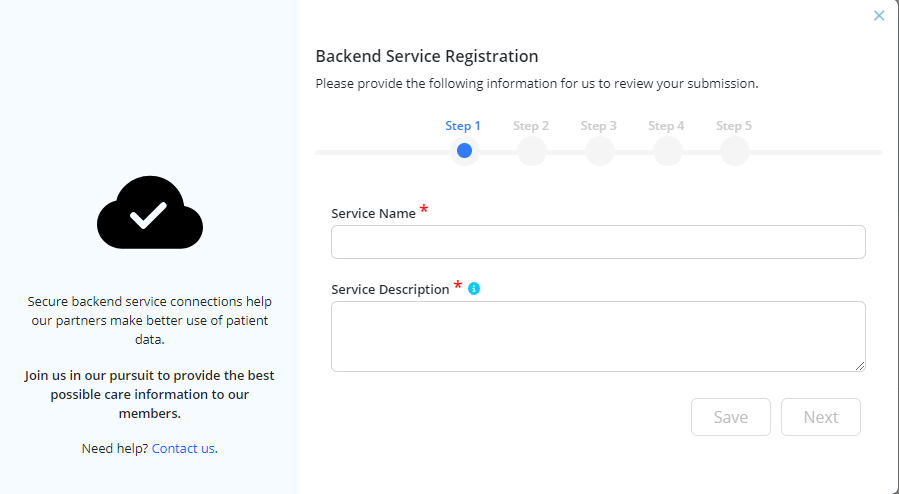
27.5.12Backend Service RegistrationTrial
Secure backend service connections help you transfer data more easily with your partners.
The 5-step process to register a backend service request includes:
Step 1: Provide the Service name and a brief description of the service you are registering, including the intended use of the data you intend to extract.
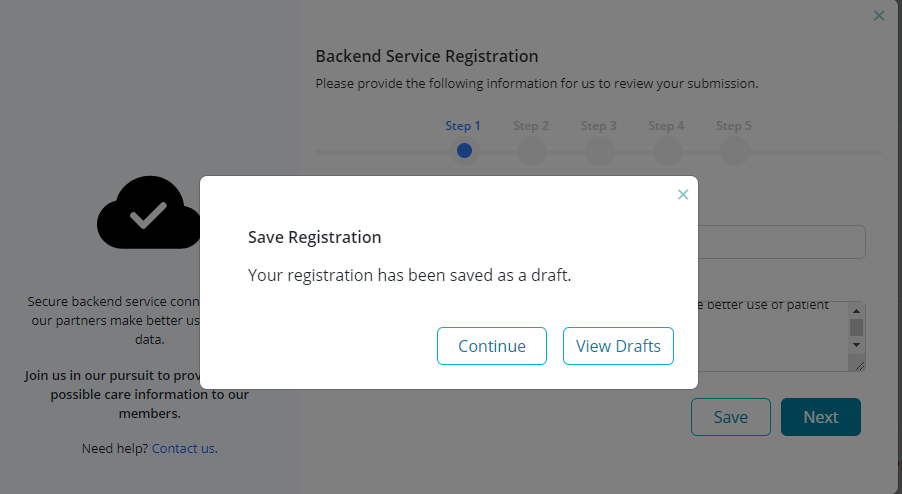
NOTE: Developers have the option to save their registration as a 'draft' and complete and/or submit it at a later stage. This can be done by selecting the option to 'Save' (provided from Step 1 to Step 5) in the registration wizard.
After selecting 'Save', developers are provided with the option to either 'Continue' working on the subsequent registration steps or 'View Drafts' to be redirected to the 'Drafts' table from where the draft registration can be accessed again.
Step 2: Select categories that apply to your backend service (multiple options can be selected for each category)
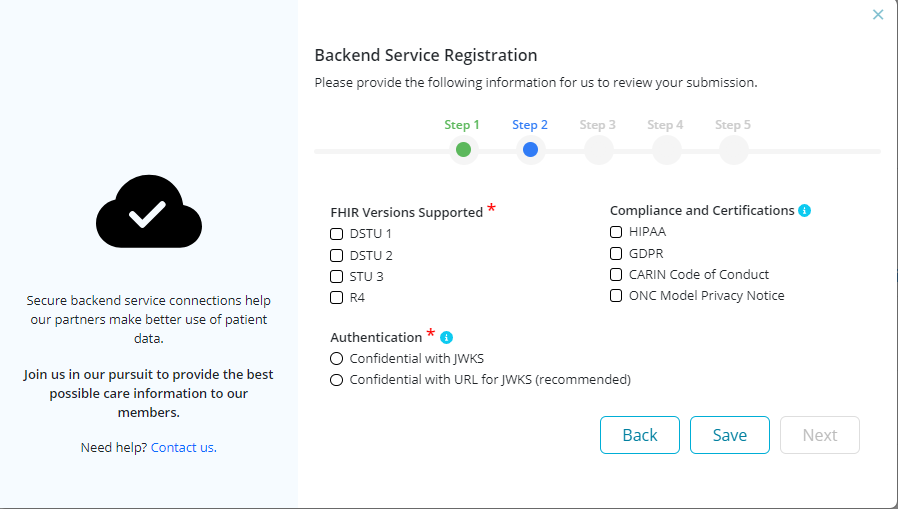
- FHIR Versions Supported can be selected.
- Compliance and Certifications: HIPAA, GDPR, CARIN Code of Conduct and ONC Model Privacy Notice 3. Authentication: Declare a method for securely connecting with the FHIR end point. It is recommended to use the Confidential with URL for JWKS. Refer to JSON Web KeySet (JWKS) for more information.
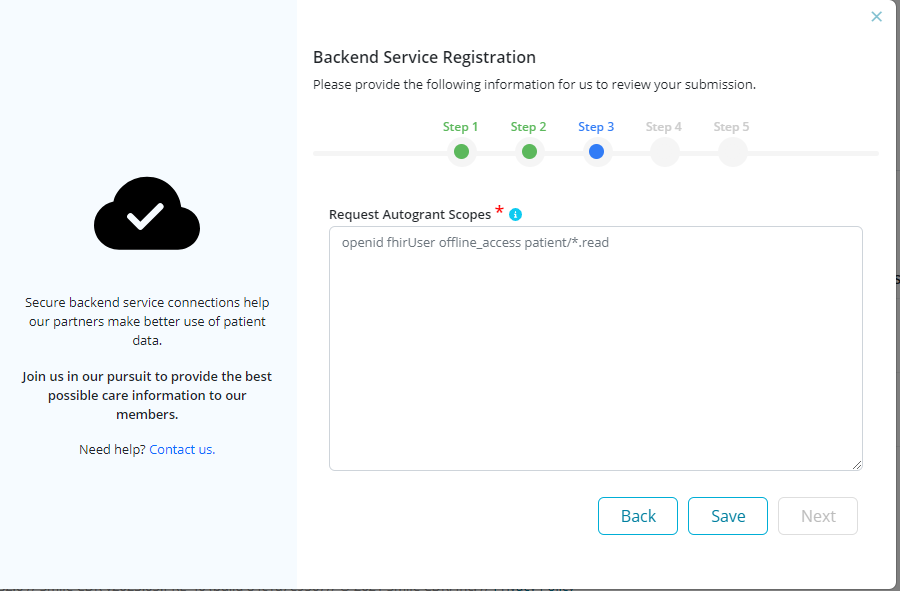
Step 3: Enter scopes to request autogrant permissions. Learn more about Supported Scopes and [Syntax] (https://hl7.org/fhir/smart-app-launch/scopes-and-launch-context.html) for more information.
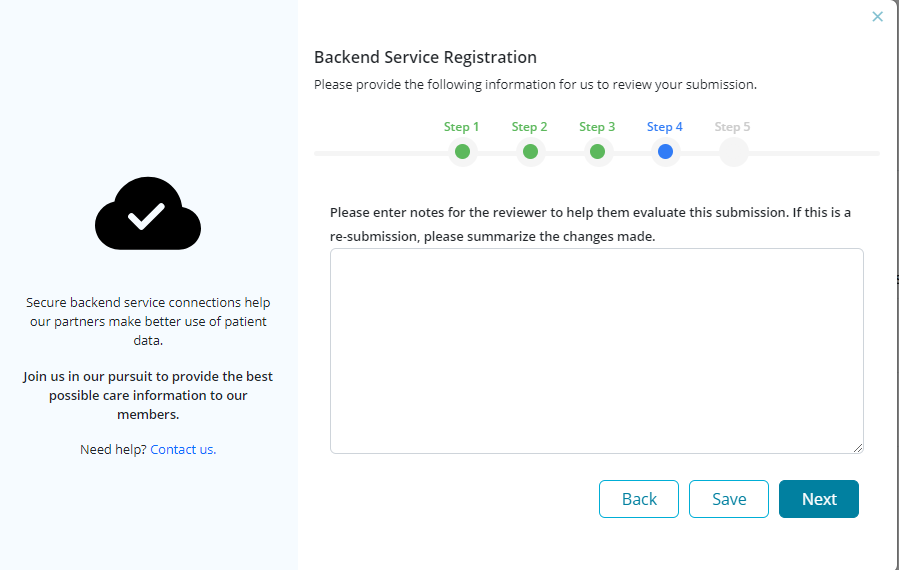
Step 4: Option to enter notes for the reviewer to help in the evaluation of the submission. If a re-submission is provided, then users are required to summarize the changes made.
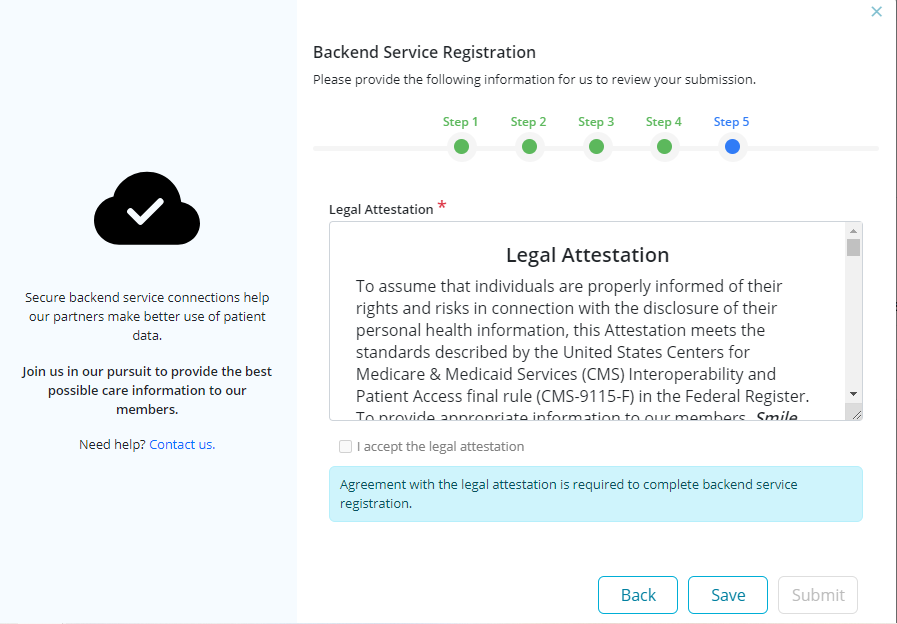
Step 5: Review legal attestation and accept adherence to the terms. It is required to accept the legal attestation to complete backend service registration.
27.5.13Additional ConsiderationsTrial
** IMPORTANT NOTE **
After an hour of inactivity, the developer will automatically be logged out of their session and the following time out message will appear.
** IMPORTANT NOTE **
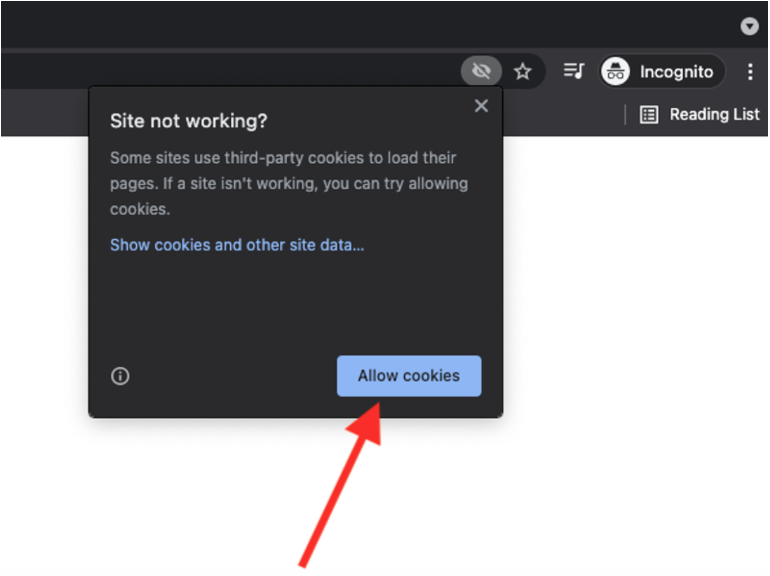
Google Chrome blocks third-party apps from sending cookies back to the server when using incognito window mode, which can have some unintended effects on the performance of Smile's appSphere application.
To avoid this, please enable cookies manually by following the instructions below.
Step 1: Select the eye icon in the URL bar and the “site not working” link.
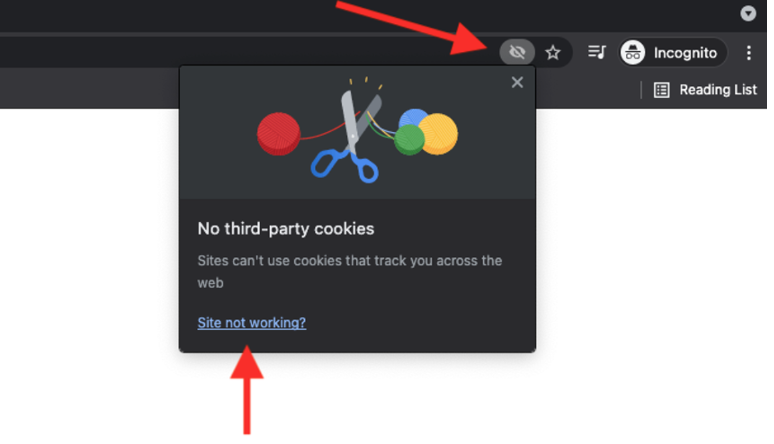
Step 2: Select “Allow cookies".