17.6.1App Management ConsoleTrial
A private internal website for platform administrators to approve, suspend or revoke access to applications.
17.6.2Management Console: UI DescriptionTrial
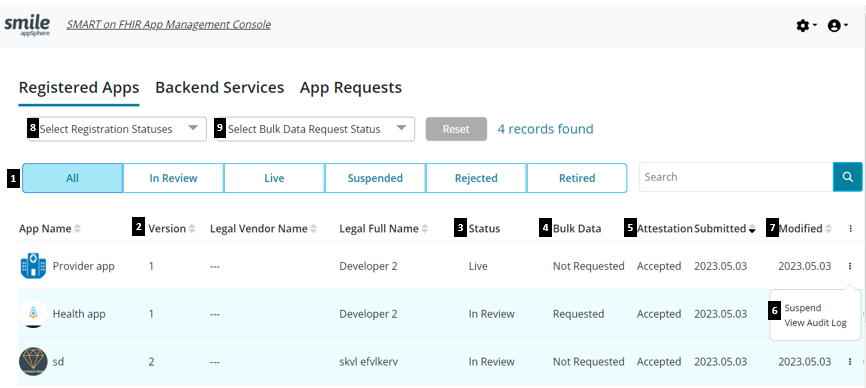
Below is a description of the UI for the App Management Console:
- Status Filters- Filter list of apps according to their status.
- Version- Denotes whether an App is new (1) or has been denied registration before and is being resubmitted (2).
- Status- Displays the current state of the App on the system. Statuses range from:
- In Review- Waiting for a decision from reviewers on registration.
- Live- App is registered and approved to be on the app gallery and to access required scopes.
- Rejected- An App is rejected when it does not meet the necessary requirements for approval. A rejection reason would be sent to the developer in this event.
- Suspended- An App can be suspended by Admin if it is found to be in violation of the Terms and Conditions or Privacy Policy.
- Retired- An App is automatically labeled as “Retired” after a new version is promoted to “Live” status.
- Bulk Data- Denotes if a particular app requested bulk data transfer permissions.
- Attestation- Denotes whether a Developer accepted or declined attestation for their App.
- Line options- Shows the options for managing an App on the list.
- Modified- Shows the date of the last change made to the status of an App.
- Select Registration Statuses - To filter and view apps for different app statuses.
- Select Bulk Data Request Status - To view apps that requested bulk transfer permissions and those that did not.
Below is a description of the UI for the App requests' tab of the App Management Console:
- App Homepage URL - Shows the link to the App's homepage.
- Requester Name- Denotes the name of the developer requesting the app.
- Requester Email - Denotes the email of the developer requesting the app.
- Date Requested - Denotes the date the app was requested by the developer.
- Days Elapsed - Number of days elapsed since this App request was submitted by the developer.
- Email Sent - A checkbox for the platform administrators to select or deselect to keep a track of whether an email response was sent back to the developer or not.
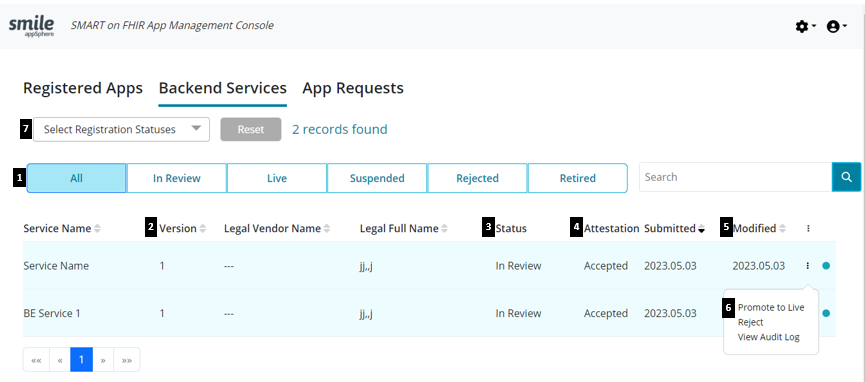
Below is a description of the UI for the Backend Services tab of the App Management Console:
- Status Filters- Filter list of backend services according to their status.
- Version- Denotes whether a backend service is new (1) or has been denied registration before and is being resubmitted (2).
- Status- Displays the current state of the backend service on the system.
- Attestation- Denotes whether a Developer accepted or declined attestation for their backend service.
- Modified- Shows the date of the last change made to the status of a backend service.
- Line options- Shows the options for managing a backend service on the list.
- Select Statuses- Denotes the registration status of the backend service. This is the same as the Status Filter.
17.6.3App Review and ManagementTrial
17.6.3.1Review
When a developer has registered an App, it appears in the Management Console as “In Review”. To aid with the review process, admins can access the 'App Information Page' to view all the information submitted for a particular app.
** IMPORTANT NOTE **
This release of appSphere does not validate developer contact information such as the email address and phone number. Admins must contact the app developer via email or phone to verify that the contact information is accurate in the event legal actions need to be taken.
17.6.3.1.1Reviewing Documents
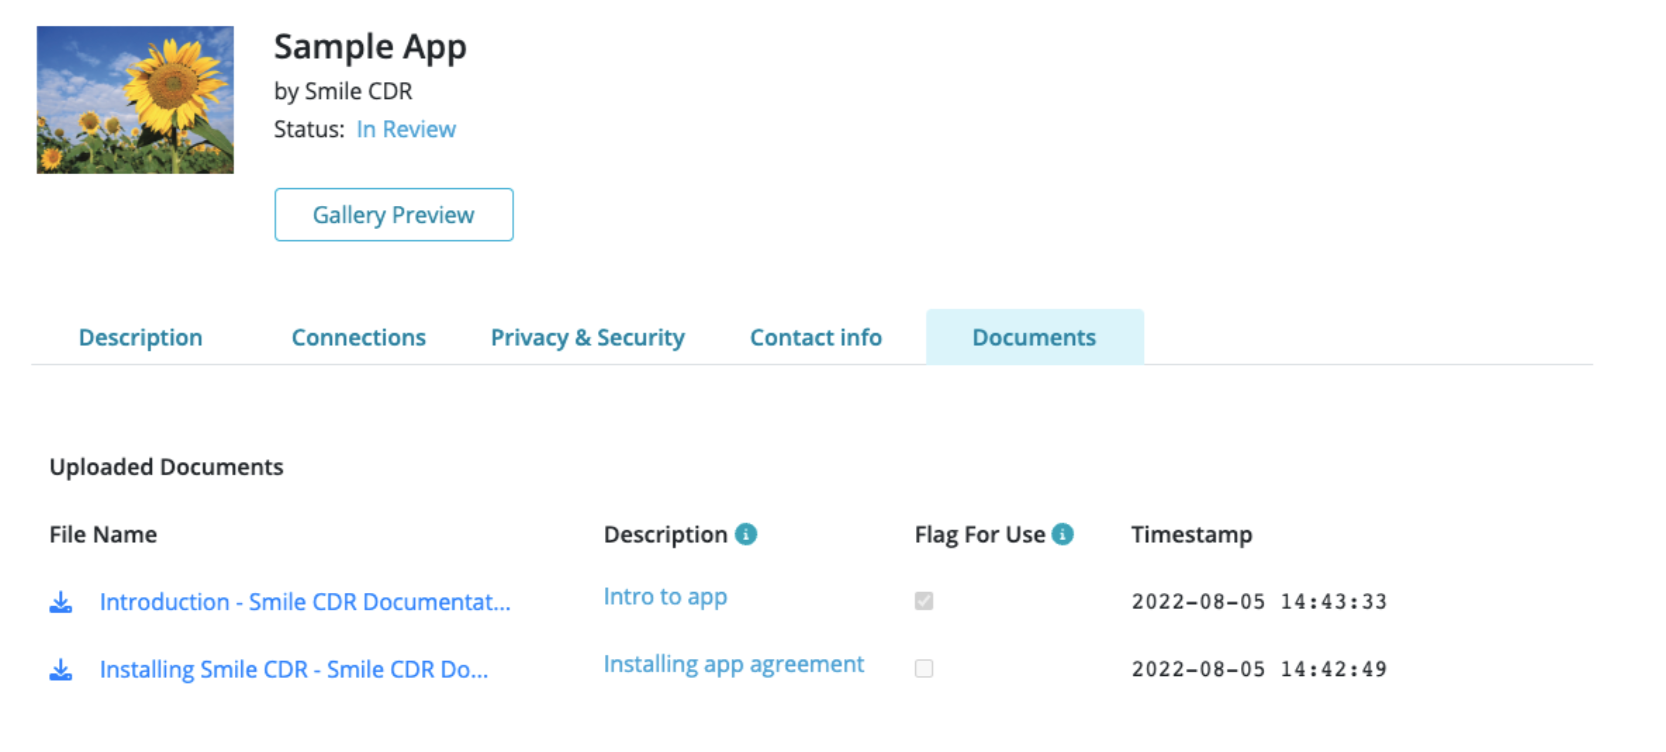
Admins need to select an App for which they wish to review the documents submitted. Within the 'App Information Page', admins must select the 'Documents' option to download submitted documents, view file name and description, check if documents have been flagged for viewing, and monitor the timestamp for uploaded documents.
Furthermore, admins will receive notification emails when new documents have been uploaded and also when any version of the uploaded documents have been flagged as 'ready for viewing'. After an admin has vetted the App, they can make the decision to either “Reject” the App or “Promote to Live”.
** IMPORTANT NOTE **
Once an App has been promoted to “Live”, admins can view the OpenID Connect Client created for that App in Smile CDR's Web Admin Console under 'OpenID Connect Clients'. However, it is recommended that no changes be made to the OpenID Connect Client if it was generated using appSphere.
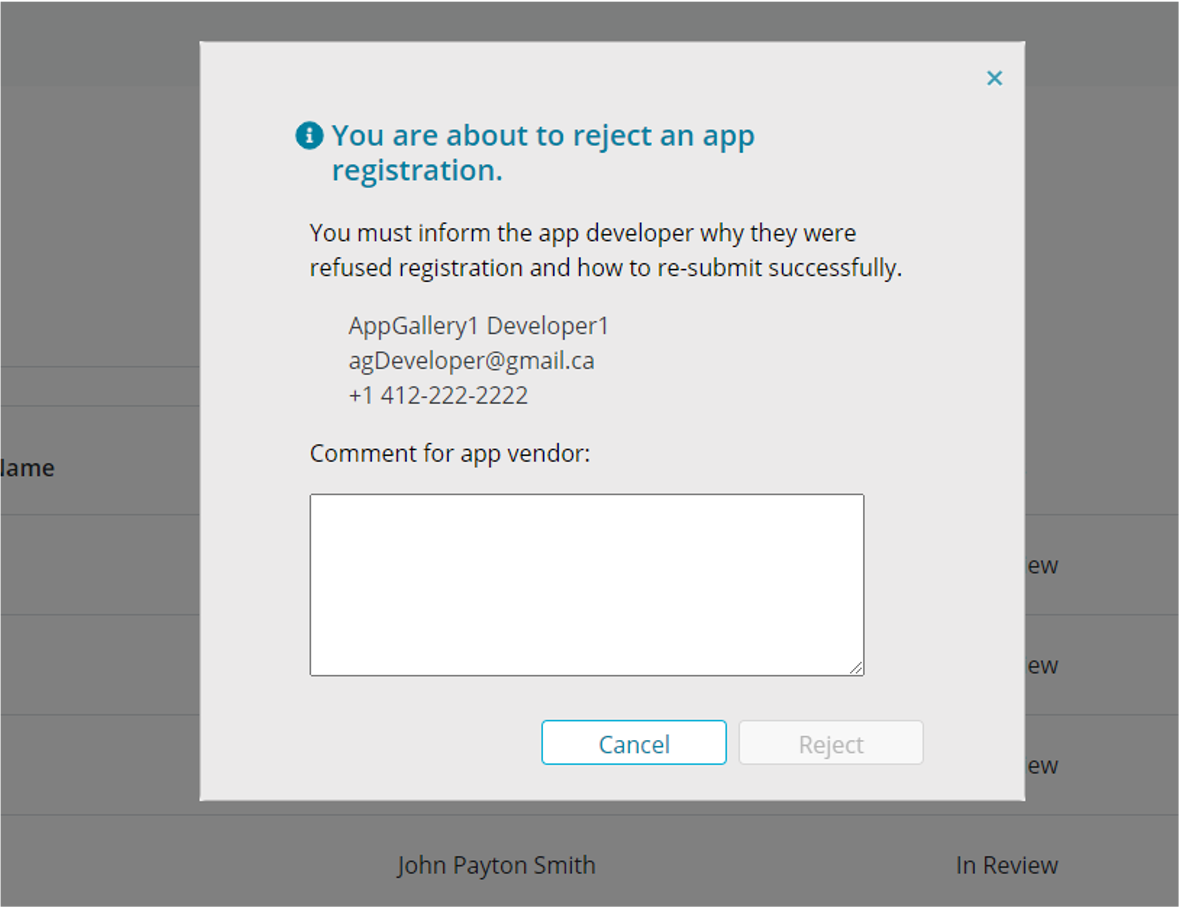
Changes to status are updated instantly. In the event an App is rejected, the admin is required to include the reason on the confirmation page. This reason will be relayed to the developer in the Developer Portal's “Message" section and the Management Console's “Audit log”.
17.6.3.1.2Reviewing Assets
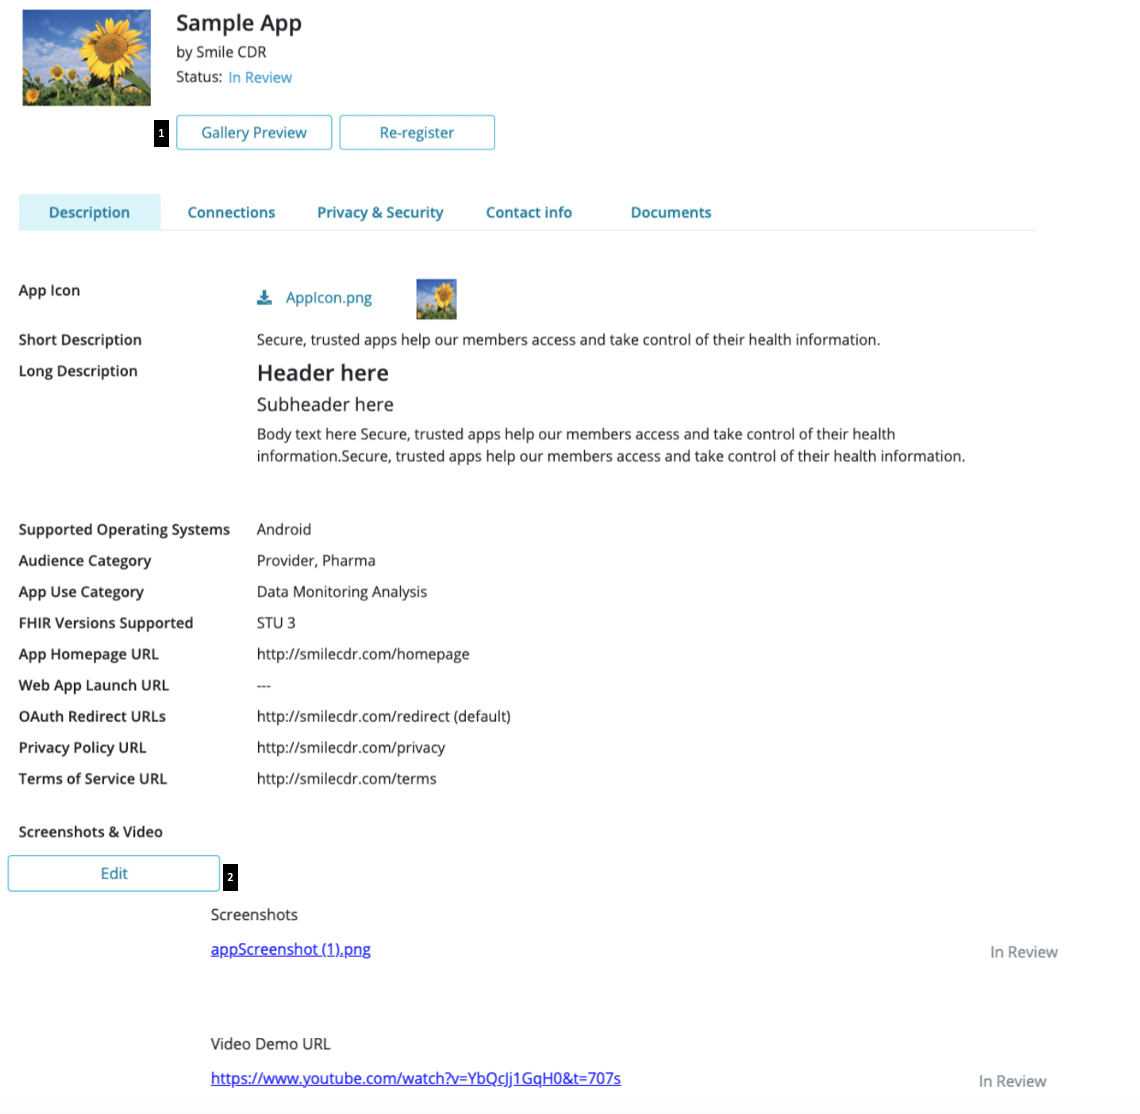
Admins will be notified via email when developers add/edit assets (screenshots and/or video) for their submitted Apps. Submitted assets can be accessed through the 'Description' tab in the 'App Information Page'. Under the 'Screenshots & Video' category, the following options are availble to review submitted assets:
- Gallery Preview: select to view approved assets (screenshots and/or video) based on how they would appear in the App Gallery
- Edit: select to make changes to the status of the submitted assets
- Assign Status: after reviewing the assets submitted, an appropriate status can be assigned from the drop-down list (i.e. 'Approved", "Declined" or 'In-Review"). Only "Approved" assets will be visible in the App Gallery.
- Save Changes: once selected, changes are saved and an email notification is sent to the developer to notify them about the changes in the status of their asset submissions.
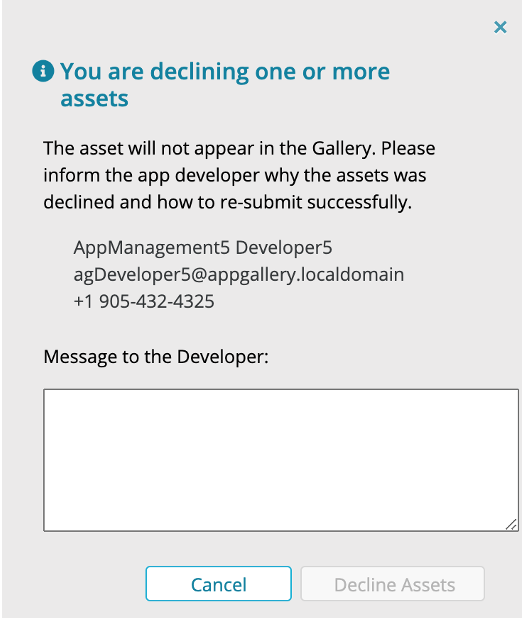
A confirmation page will appear after selecting 'Save Changes' if any submitted assets were declined. Admins are required to specify why the assets were declined and how to re-submit successfully. This message will be included in the email notification sent to developers.
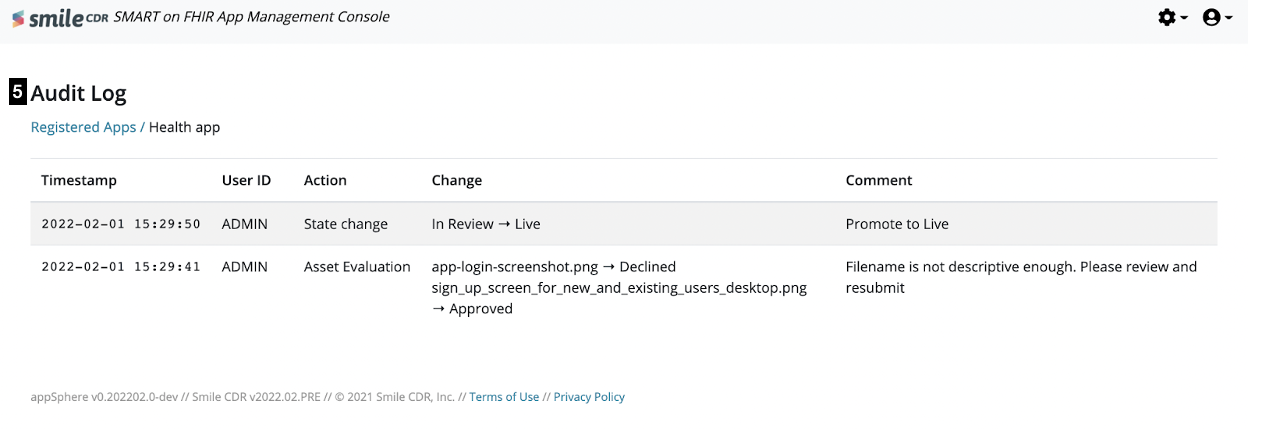
- Audit Log: select 'View Audit Log' from the 'Registered Apps' table (see 'Audit Log' section below) to monitor changes made in the status of submitted assets. Changes will be categorized as 'Asset Evaluation' under the 'Action' column and a short explanation for the change can be added under the 'Comments' column.
17.6.3.2Audit Log
The audit log tracks and displays all changes to the status of an App and any messages associated with the App.
To view the audit log of an App:
- Open the line options for the App, then select 'View Audit Log' from the displayed dropdown, or
- Click on the date under the Modified column
17.6.3.3Management
It is recommended that Apps and their associated developers that have been promoted to live should be evaluated periodically to ensure they remain compliant with the Terms and Conditions, and Privacy Policy.
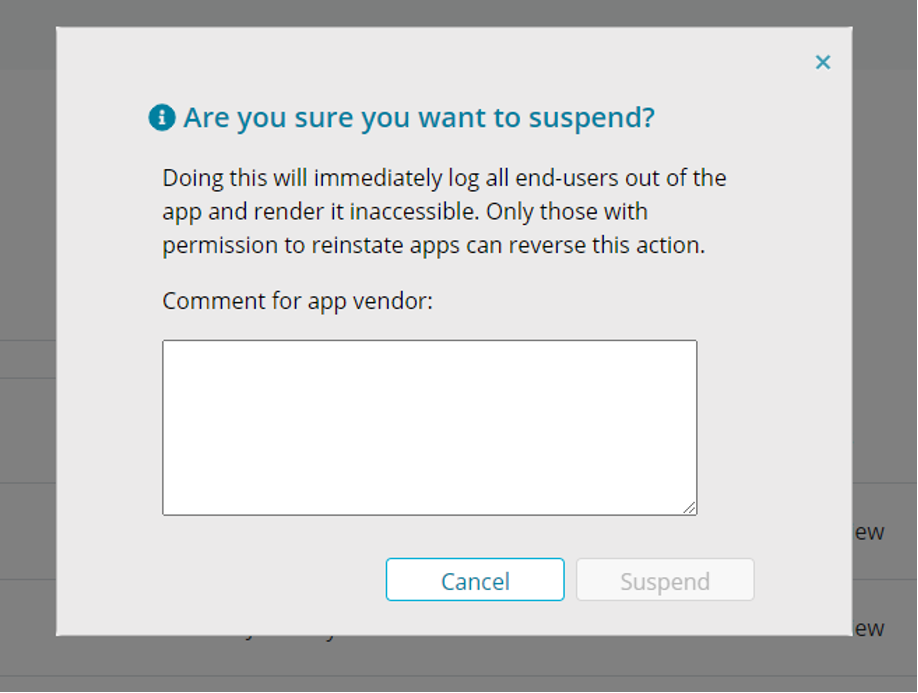
- In the event that action needs to be taken on an App, the Admin can "Suspend" the App.
- When an Admin decides to "Suspend" an App, they are required to include a reason in the confirmation page for use in the review.
17.6.3.4Managing Attestation Documents
Admin can manage attestation documents easily from the Management console in just a few steps.
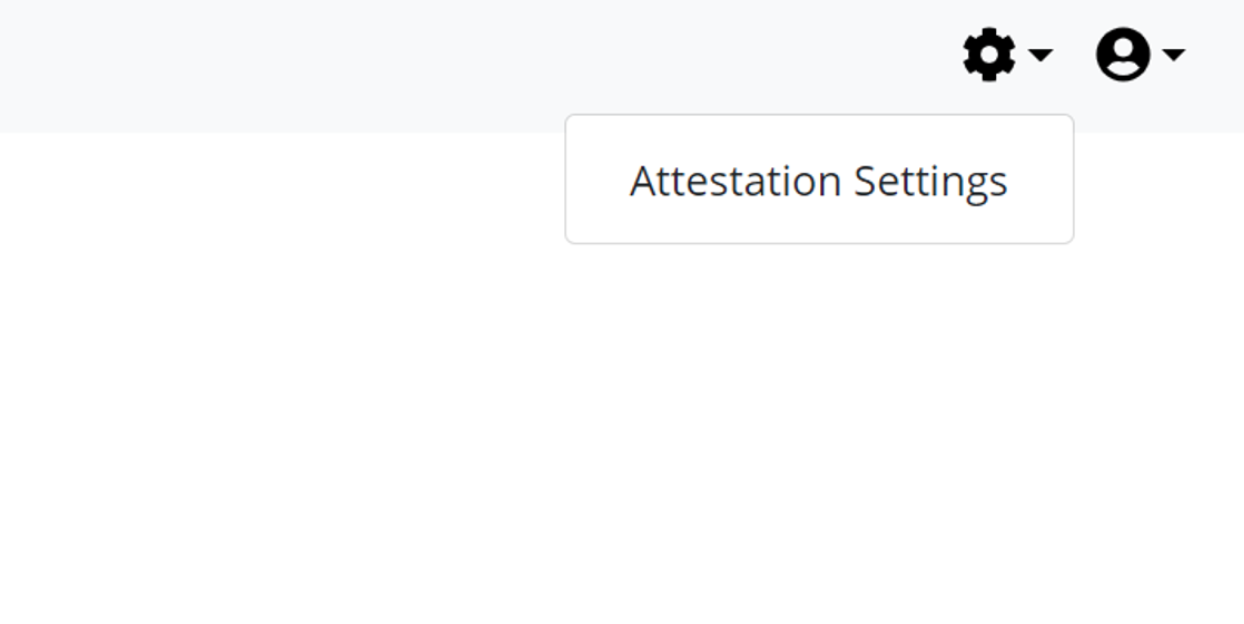
- Navigate to the "Settings" icon and select “Attestation Settings” from the dropdown.
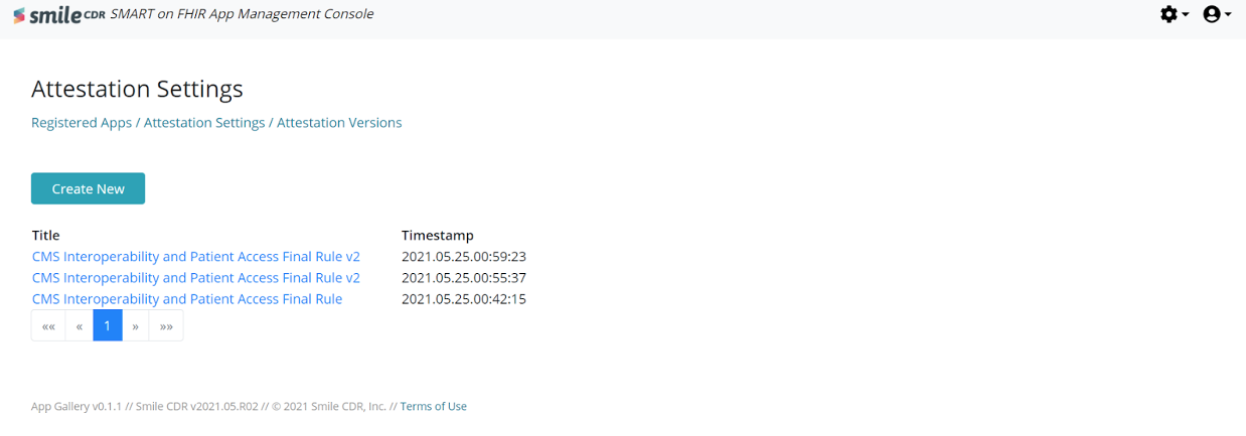
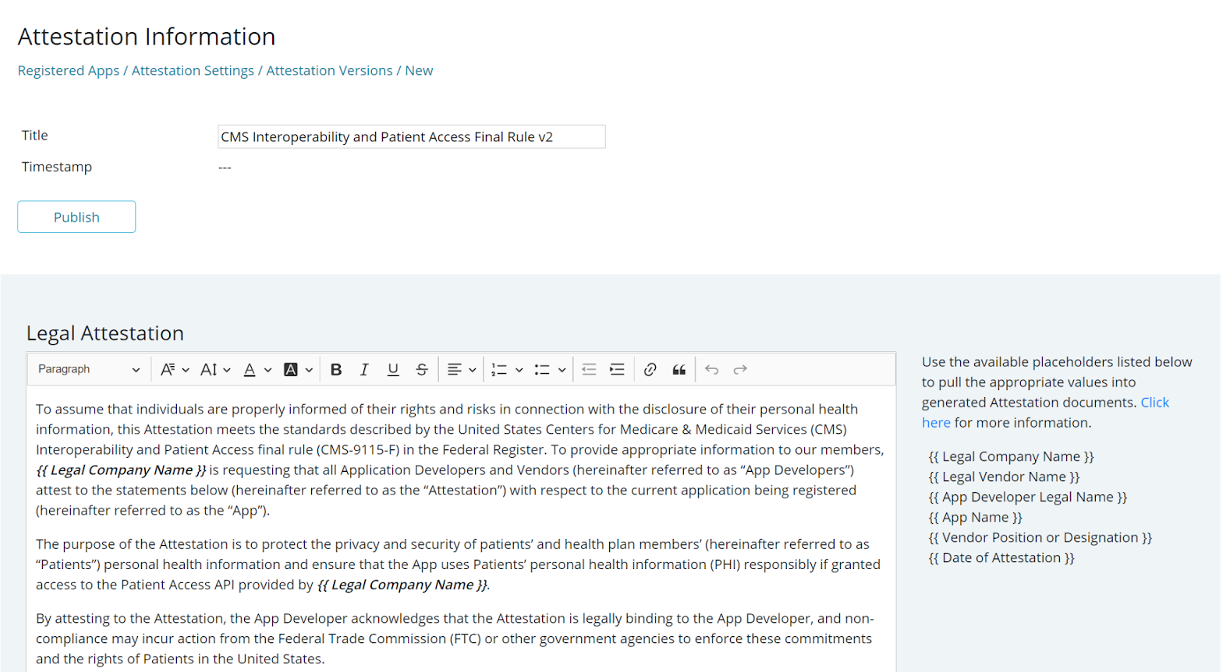
Here an Admin can either open a specific version from the existing list of attestations, or create a new version of the attestation document by clicking on the "Create New" button. The Admin is then taken to the Attestation text editor page from where the new document can be modified and published.
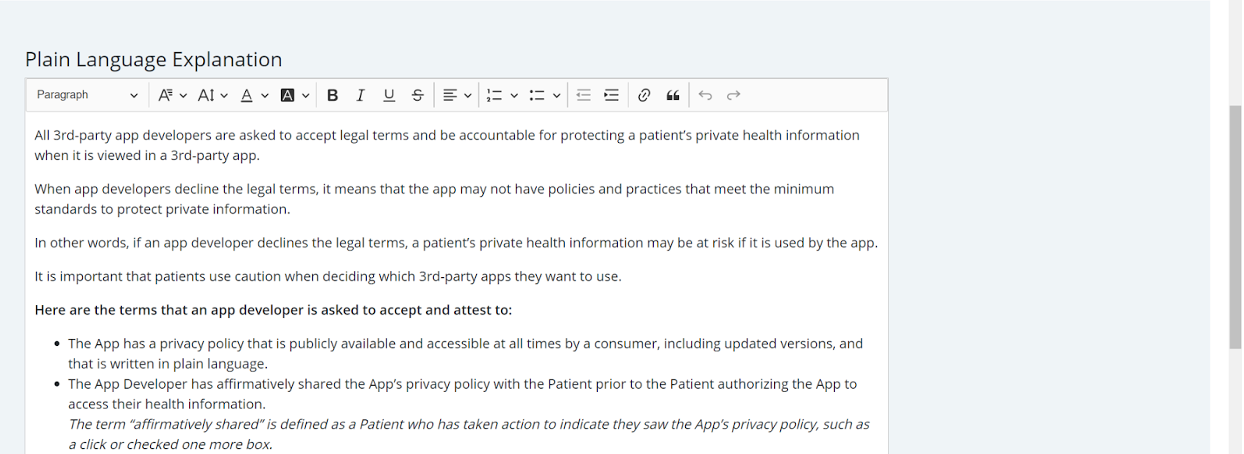
The attestation editor page is separated into the following two sections:
- Legal Attestation: displayed to developers in the Developer Portal during App registration.
- Plain Language Explanation: shown to end users of an App hosted on the App Gallery or when signing into the App for use.
** IMPORTANT NOTE **
To successfully edit and publish a new Attestation the following guidelines should be followed:
- The auto populated text fields {{in curly braces}} should be included.
- The length of the Attestation text is long enough to enable scrolling in the text box. Approximately 5 - 6 sentences will suffice. If the text is too short, the radio buttons to ask the developer to accept or decline the Attestation will be disabled because they can’t “scroll to the bottom” of the Attestation.
- The only formatting that is allowed are the options provided in the text editor. For example, images and tables are not supported, but bold fonts, colors, and bullets are supported.
Placeholders such as those included in the 'Legal Attestation' section (e.g. {{ Legal Company Name }}) must not be added to the 'Plain Language Explanation' as they will remain unchanged (i.e. placeholders will not pull any values into generated documents). For example- adding {{ Legal Company Name }} as a placeholder will appear unchanged as {{ Legal Company Name }} in generated Attestation documents.
When a change or new attestation is published the update can be instantly observed in the App Registration wizard on the Developer Portal.
17.6.3.5New App Requests
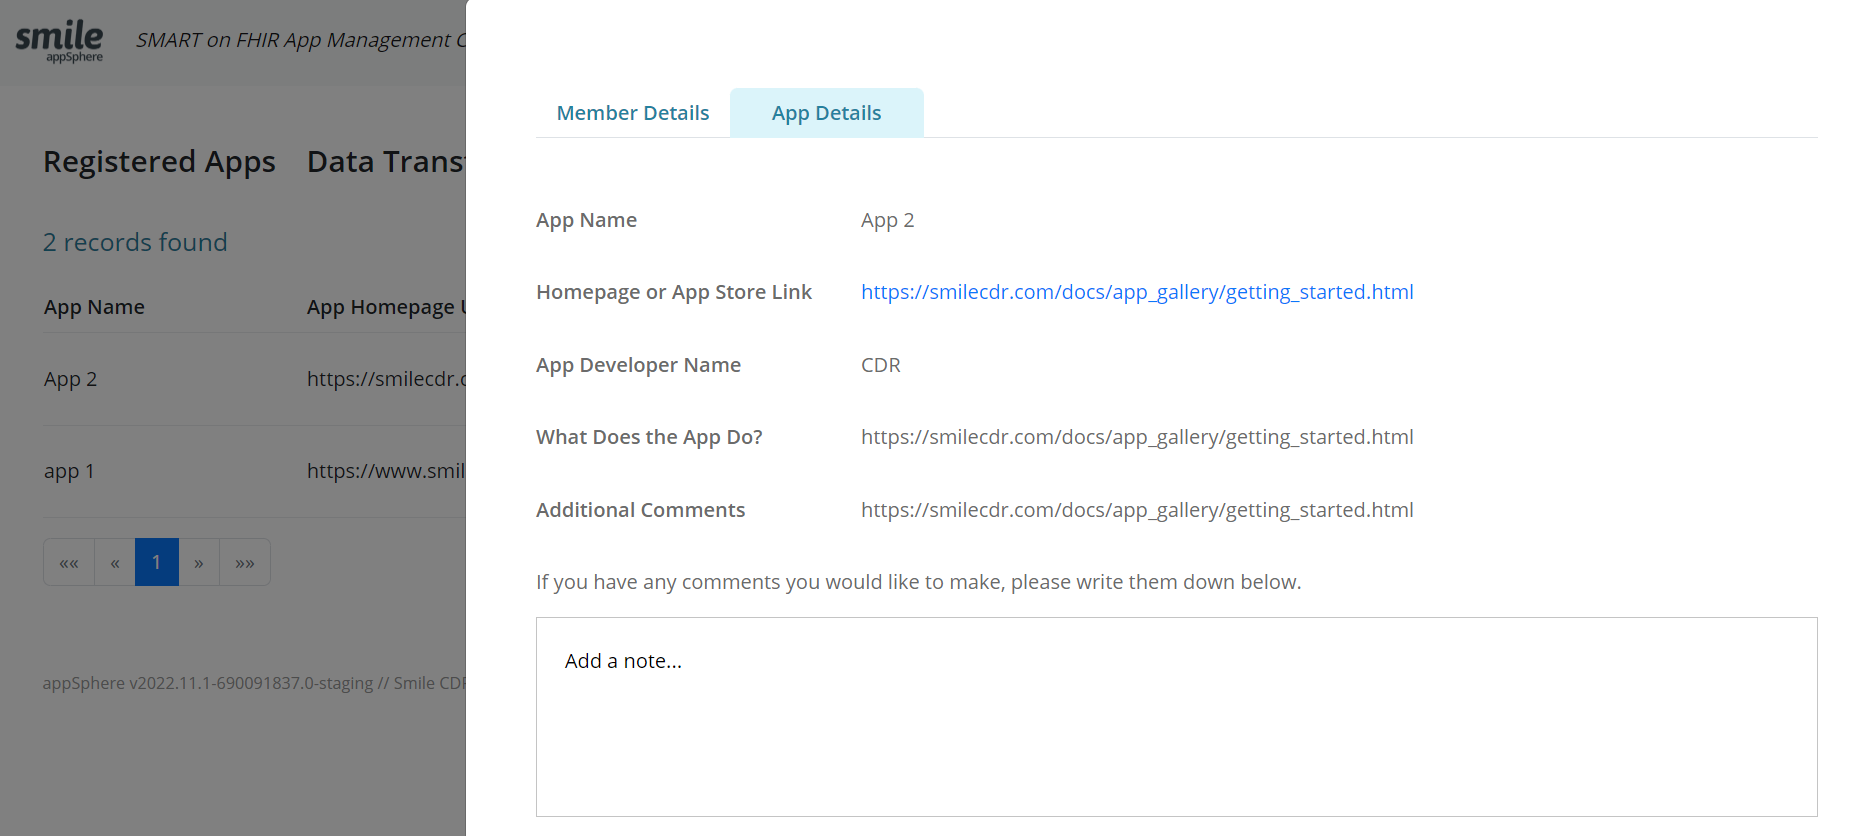
Admins will be notified via email when a new app request has been submitted by a patient/member. Admins can then login to the App Management Console and view the details related to the request by selecting the 'App Requests' table.
A list of all app requests received will be visible to the admin under the 'App Requests' table. Using the information collected, admins will be required to take the initiative to reach out to the app developer and ask him/her to register their app via the Developer Portal.
Admins can click on any of the apps in the 'App Requests' table to track if an email was sent to the App requester and add additional notes if they choose to do so.
17.6.4Backend Service Review and ManagementTrial
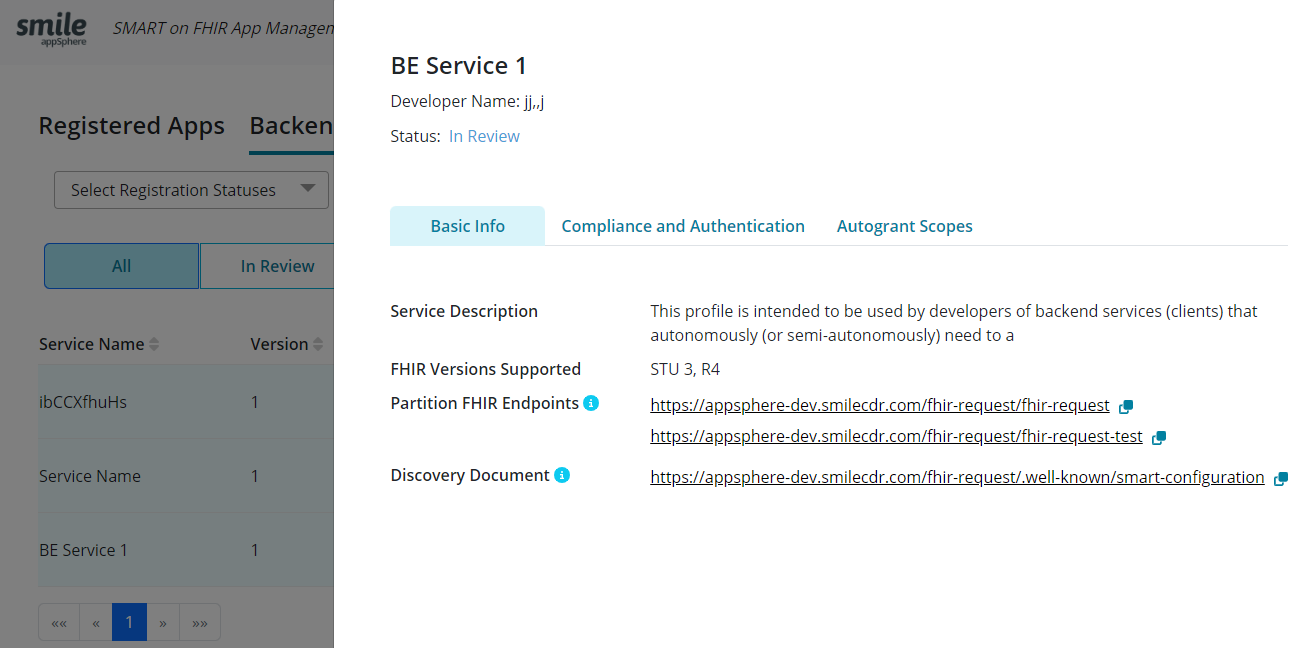
Admins will be notified via email when a new backend service request has been submitted by a developer. Admins can then log in to the App Management Console and view the details related to the request by selecting the 'Backend Services' table.
A list of all backend service requests received will be visible to the admin under the 'Backend Services' table.
17.6.5UpgradingTrial
Starting from Smile CDR v2023.08.R01 AppSphere admin user configuration requires assigning Bulk Export permissions listed below:
- Permission. "OIDC_CLIENT_PRESET_PERMISSION", argument. "FHIR_OP_INITIATE_BULK_DATA_EXPORT"
- Permission. "OIDC_CLIENT_PRESET_PERMISSION", argument. "FHIR_OP_INITIATE_BULK_DATA_EXPORT_GROUP"
- Permission. "OIDC_CLIENT_PRESET_PERMISSION", argument. "FHIR_OP_INITIATE_BULK_DATA_EXPORT_SYSTEM"
- Permission. "OIDC_CLIENT_PRESET_PERMISSION", argument. "FHIR_OP_INITIATE_BULK_DATA_EXPORT_PATIENT"
After upgrading, please make sure that appSphere users have all required roles and permissions listed on the Configuring Different Users page.
** IMPORTANT NOTE **
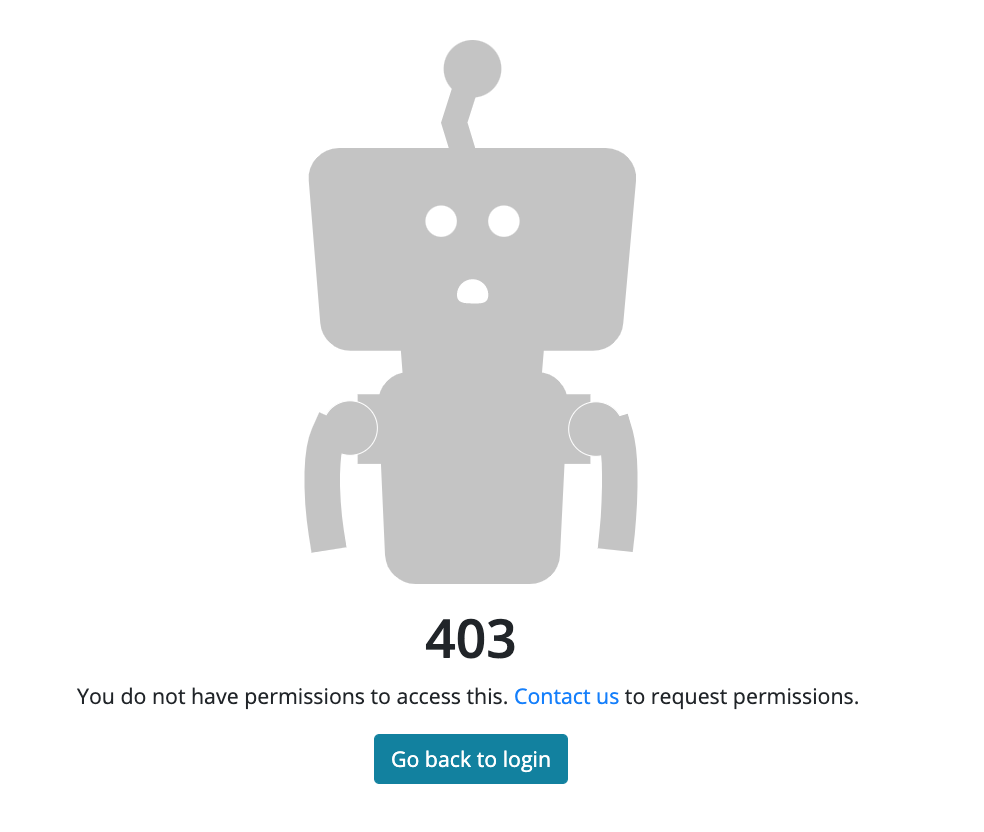
If the correct permissions for the admin role are not assigned, then the following error message will be displayed when admin tries promoting to Live application in Admin Console.
17.6.6Additional ConsiderationsTrial
** IMPORTANT NOTE **
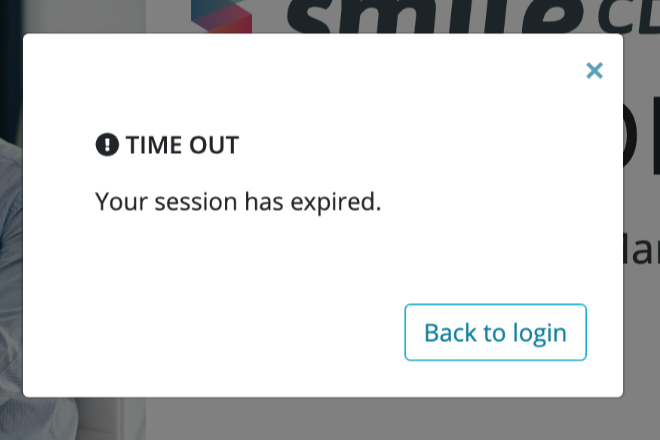
After an hour of inactivity, the admin will automatically be logged out of their session and the following time out message will appear.
** IMPORTANT NOTE **
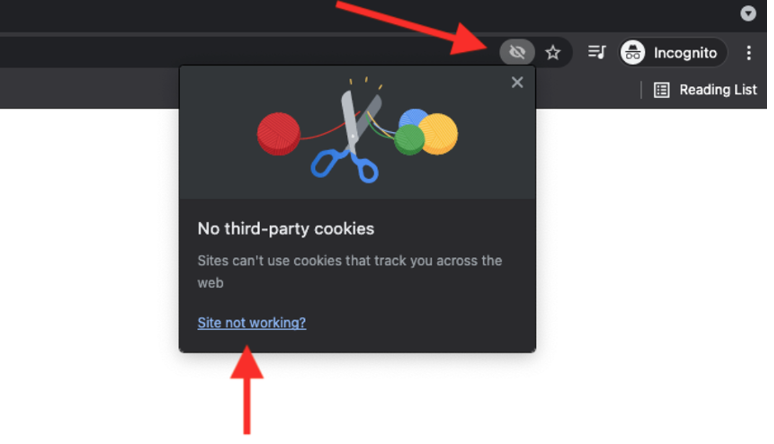
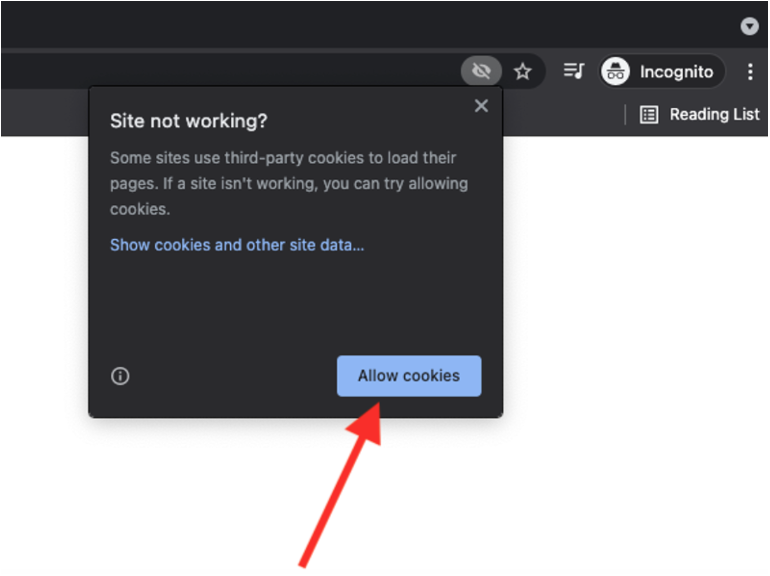
Google Chrome blocks third-party apps from sending cookies back to the server when using incognito window mode, which can have some unintended effects on the performance of Smile's appSphere application.
To avoid this, please enable cookies manually by following the instructions below.
Step 1: Select the eye icon in the URL bar and the “site not working” link.
Step 2: Select “Allow cookies".
